1976 Honda C90 Delux
Here is a Honda promotional pamphlet on the C90 Delux - a very smart, spiffy looking unit. After all, you do meet the nicest people on a Honda.
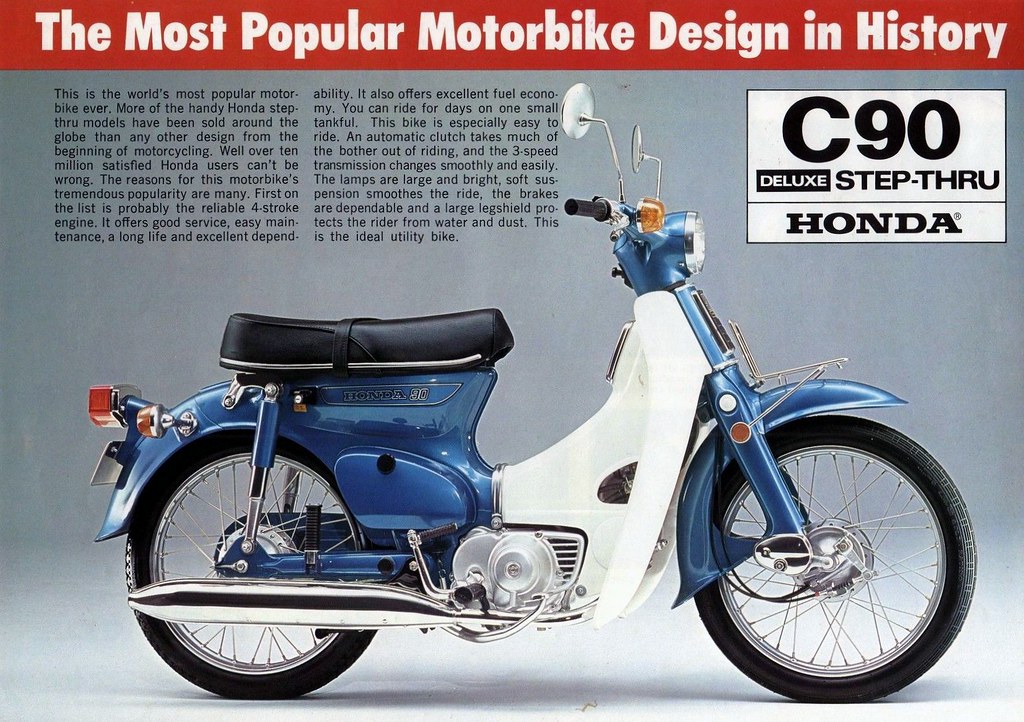
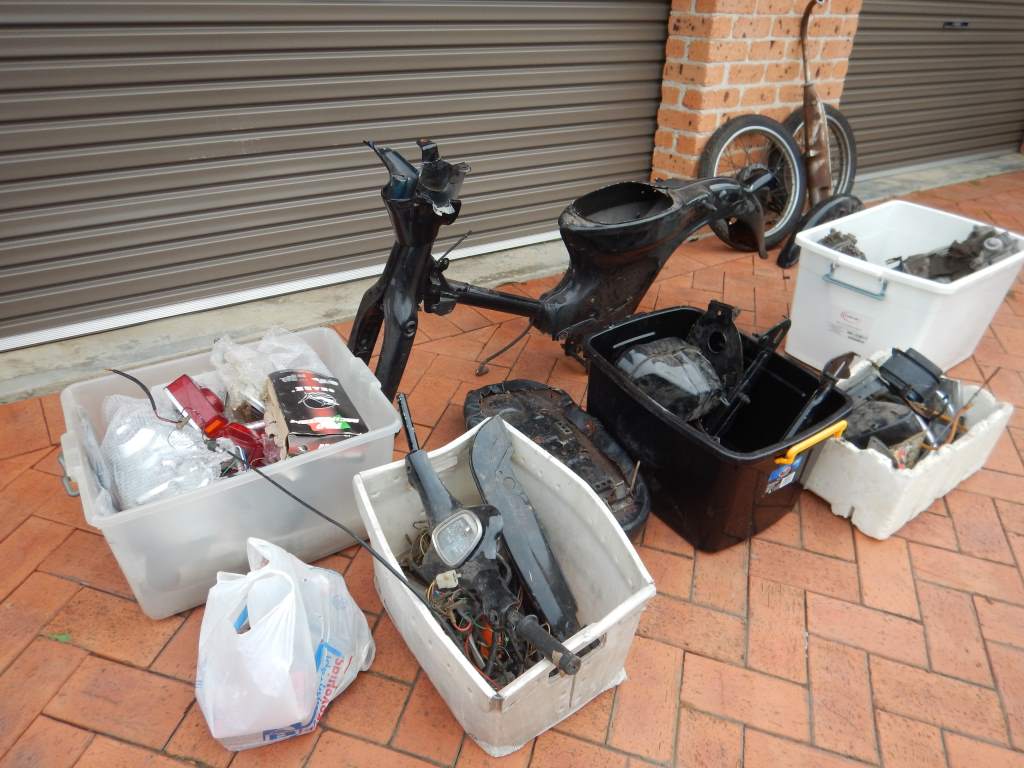
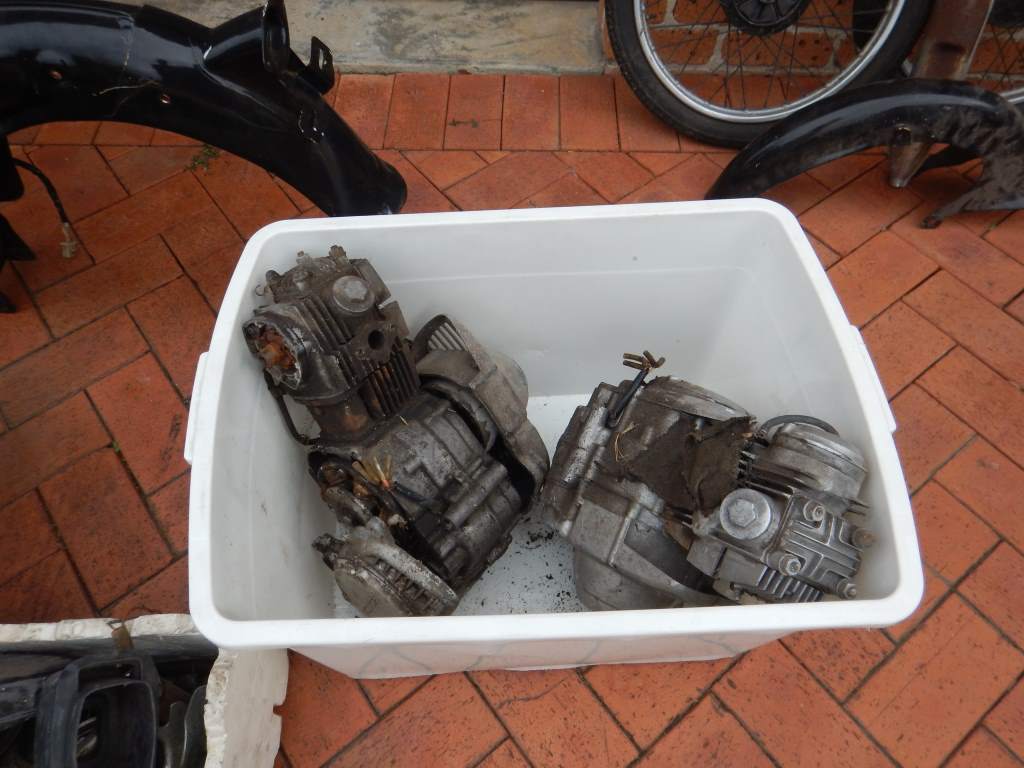
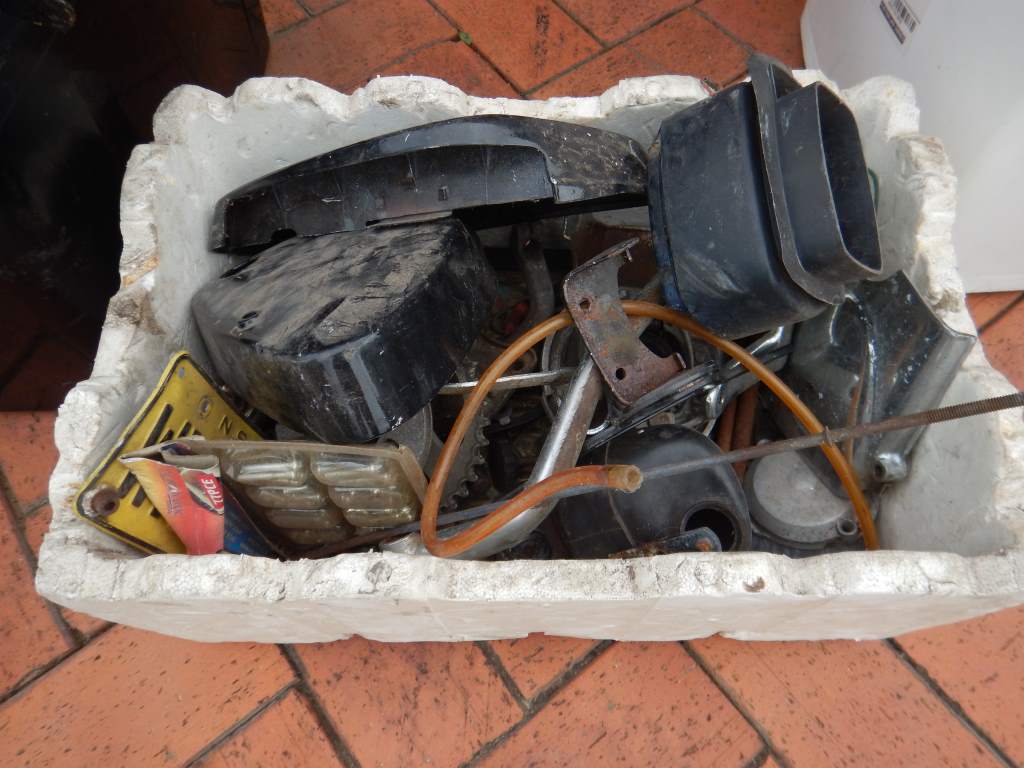
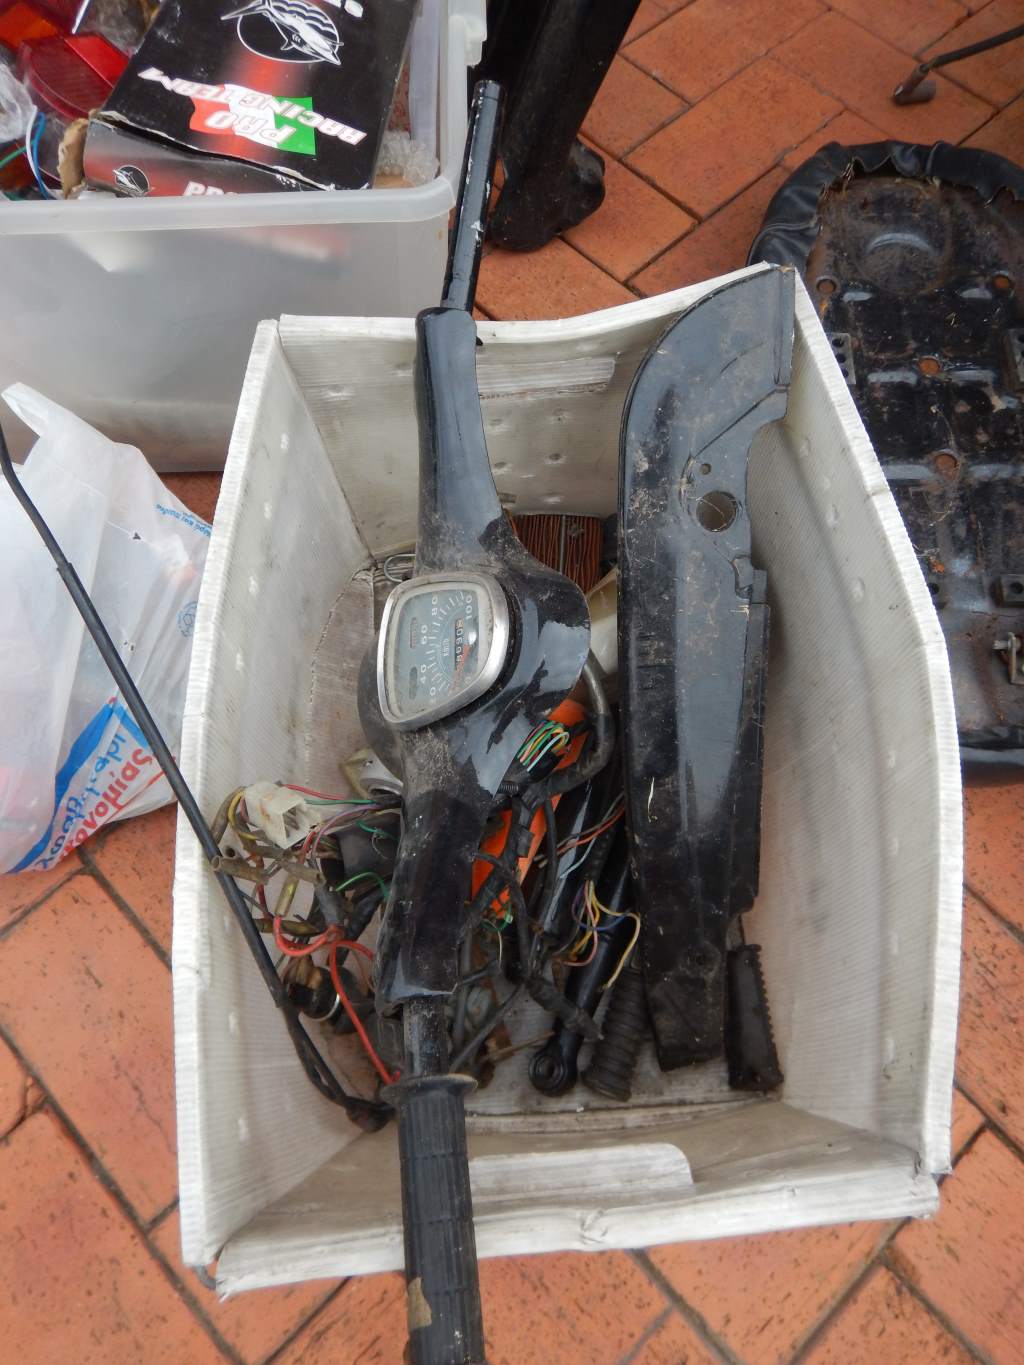
But of course if my new bike (or rather, Basket Case), looked like that, there would be nothing to put on this restoration page. So this is what my bike looks like in reality!!
24 March 2020
I'm not sure when you'll be reading this, but you will no doubt remember the great Toilet Paper rush associated with the Corona Virus - and how it spread to Pasta, and canned foods. People were panic buying everything.
Well I am embarrassed to admit that I got caught up in the stupidity. I have been Panic Buying Honda Cubs.
Apart from the Basket Case you see here - I have bought a 1970 Honda C50, a 1976 Honda C90 and yet another mid 70s Honda C90 Delux. They will all make an appearance here sooner or later - so we have something to thank the COVID-19 virus for.
25 March 2020
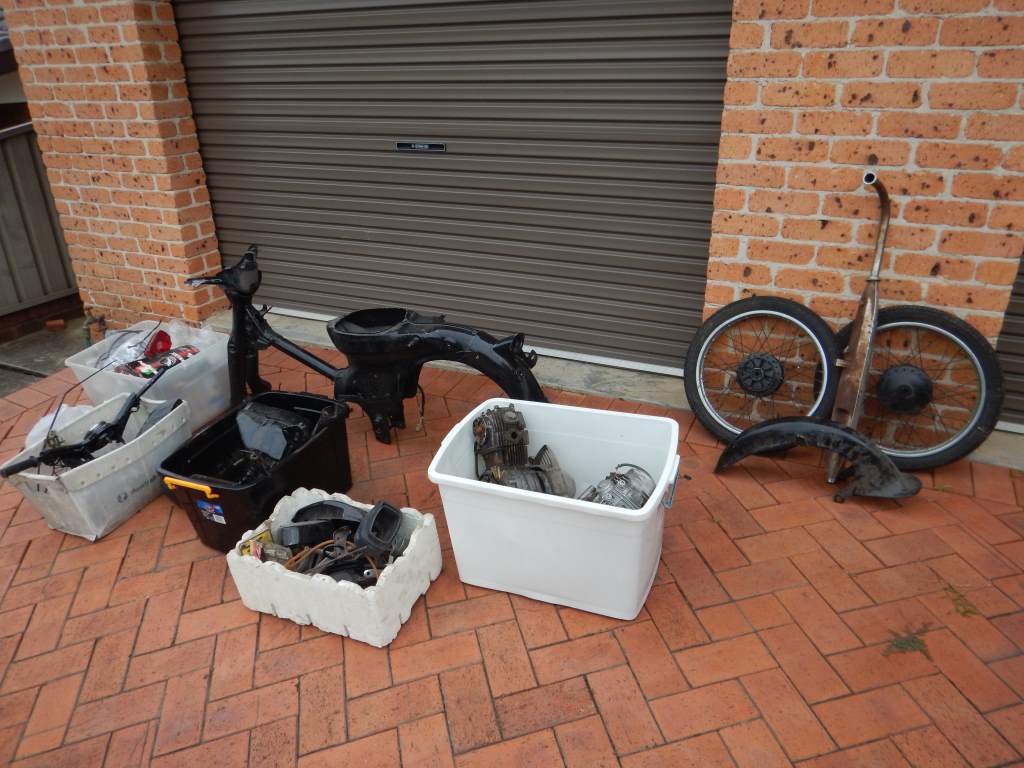
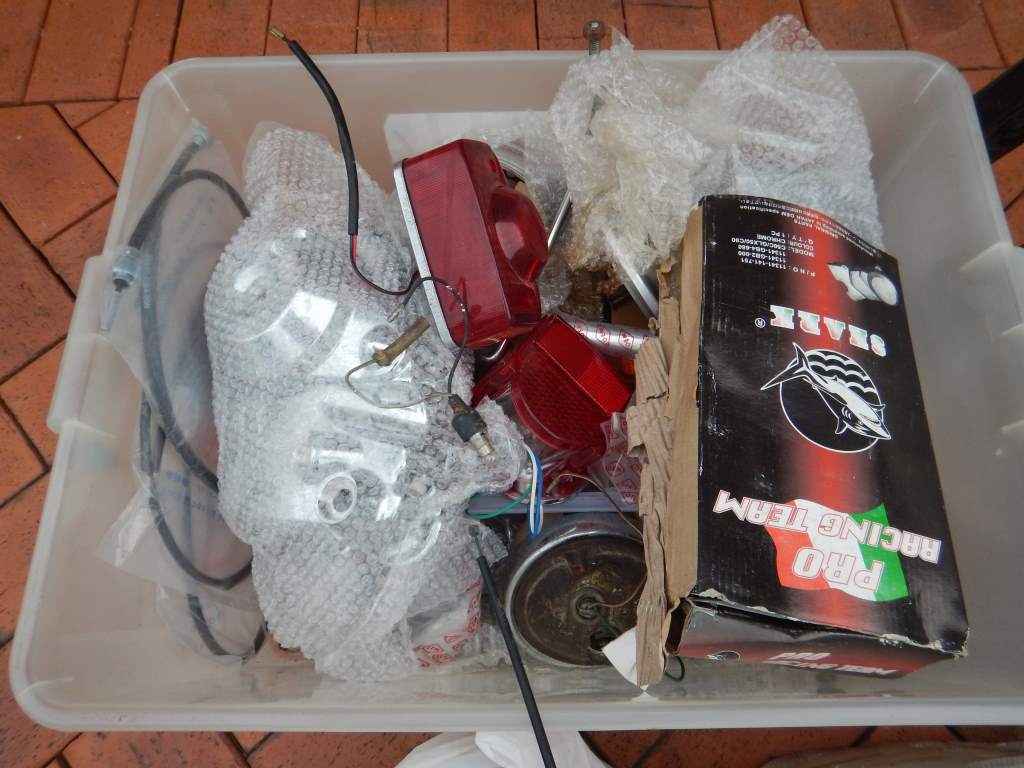
I have started trying to organise all the bits and pieces that came with the basket case, and identify things I need to buy.
Obviously its going to need a Leg Shield and a new rear fender extension, so they go top of the list.
Its priving surprisingly difficult to put an exact Year/Model to the bike - and obviously I need to do that to order the bits I need.
The C90 Club is a fantastic source of info (and a great bunch of guys) but unfortunately my bike is an Australian delivery model that was never released in the UK, so they don't have a great deal of knowledge on it. But that's OK - I enjoy researching the bikes almost as much as I do rebuilding them.
31 March 2020
Well work has commenced on the C90 - not much work mind you, but some.
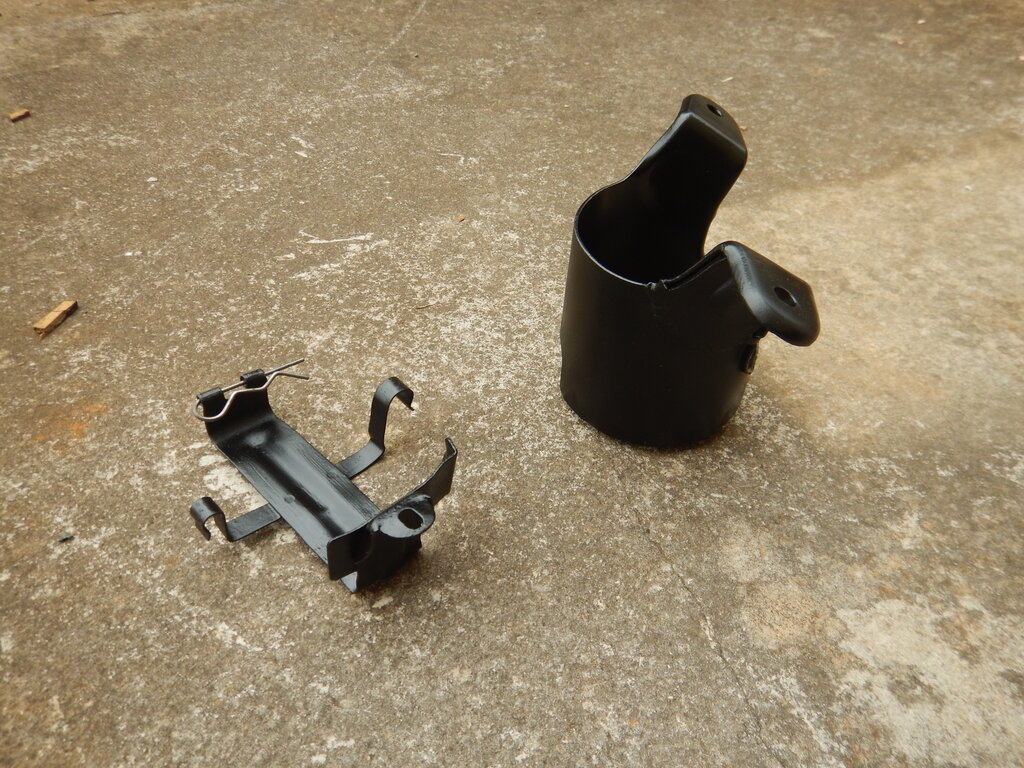
I had to head off for 3 weeks work, so I snuck a few items into my luggage to make use of the time I was away. I took the hinge bracket for the seat, the stand, the plate which covers the petrol tank and the bracket that clamps the petrol tank to its cover.
I turned my hotel room into a workshop and got stuck in.
The hinge bracket for the seat was the first item I attacked. It was still covered in black paint, but it had a bit of rust around the inner seams. Nothing too dramatic, but definitely worth getting rid of - as is all rust. Paint stripper, sanding, soaking in vinegar, neutralising in Baking Soda, wire brushing, cleaned with Wax and Grease Remover and it was ready for Etch Primer.
The metal strap that clamps the petrol tank to the petrol tank cover was next. This was in really good condition, but it got pretty much the same treatment as the seat hinge, just in case there was any spots of rust starting around the bolt holes or somewhere else out of sight. So washed, dried, wire brushed, paint stripper, vinegar, baking soda, Wax and Great Remover and thenEtch Primer - and then set aside to dry.
Just because I can't help myself I bought a new cordless Rotary Tool to help cleaning these up. I already have two of them (one still brand new), but they are both corded ones. I must admit to loving the cordess one. It is an el cheapo Ozito one from Bunnings ($49.00) but its got a full 3 year replacement warranty, so how could you go wrong really? The other one I was contemplating was an original cordless Dremel at nearly $200. I am a big advocate of getting the best tools you can afford, but I dunno, for 4 times the price......its hard to justify.
1 April 2020
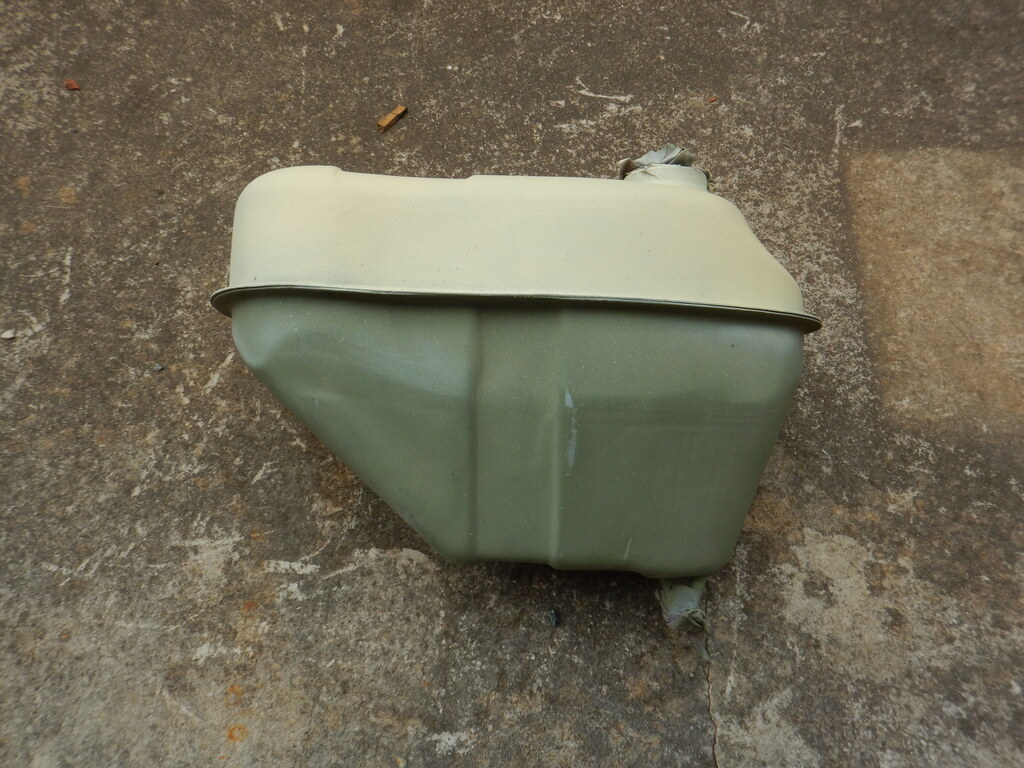
The other two bits didn't go quite so well. The petrol tank cover was a real bugger to get the paint off. For some reason the same paint stripper I used so sucessfully on the other bits didn't work so well on this bit. Not sure why. After a ton of work I got about 90% of the paint off, which revealed another layer of paint below it, plus a thin layer of filler. I'm not entirely sure why there is filler there, the surface underneath looks pretty good. But after the nightmare with the cover, I didn't even have a go at the centre stand - I just dropped them around to the local sand-blaster. He assured me they would be quick to blast and very cheap.
3 April 2020
So now the tank cover and the seat hinge are well dry - I gave them a bit of a light sanding with Wet and Dry and gave them a coat of Primer Filler. Let them dry and then another coat, and they have both come up very well.
I think I am going to paint this bike up in Army Green to make it likea little Military Bike. I've got a few cans of Rust-O-Leum Army Green back at home but I don't have any here with me, and I'm not sure if any of the local shops have it, so it might have to wait until I get back home for its top coat.
Now just to wait for the other two bits to come back from the Sand Blaster.
4 April 2020
I have found an absolutely brilliant resource for the Engine of the Honda 50, 70 and 90 series Horizontal Engine. If you are interested in rebuilding one of these engines, then this You Tube Channel should be considered mandatory viewing. He has many video, which are clear, and well explained. He has quick versions and long detailed versions - I suggest you watch them all.
YouTuber - Mini Motor Man.
Here is a link to all his videos:
He has a quick over view series (which is still more detailed than anything elseI have seen on the net) on both How to Disassemble and How to Rebuild the Engine. And he also has a full 9 part series, very detailed series on the Rebuild - about 11 hours of viewing just on the rebuild. I suggest you watch them all.
I have linked to the first video in both the Short Series and the Detailed Series below - you should be able to follow on to subsequent parts after you've finished Part 1. I can't stress enough - watch them - you will learn heaps.
13 April 2023
Well I have finally got back to the little C90.
I had now retired, so I've got time to devote to the things I want to do, rather than the things I have to do. Wel......there are still things I have to do that take time, but I have a lot more time to work on my hobbies. The main drain on my time is finally, after all these years, getting the workshop organised...but that's another story.
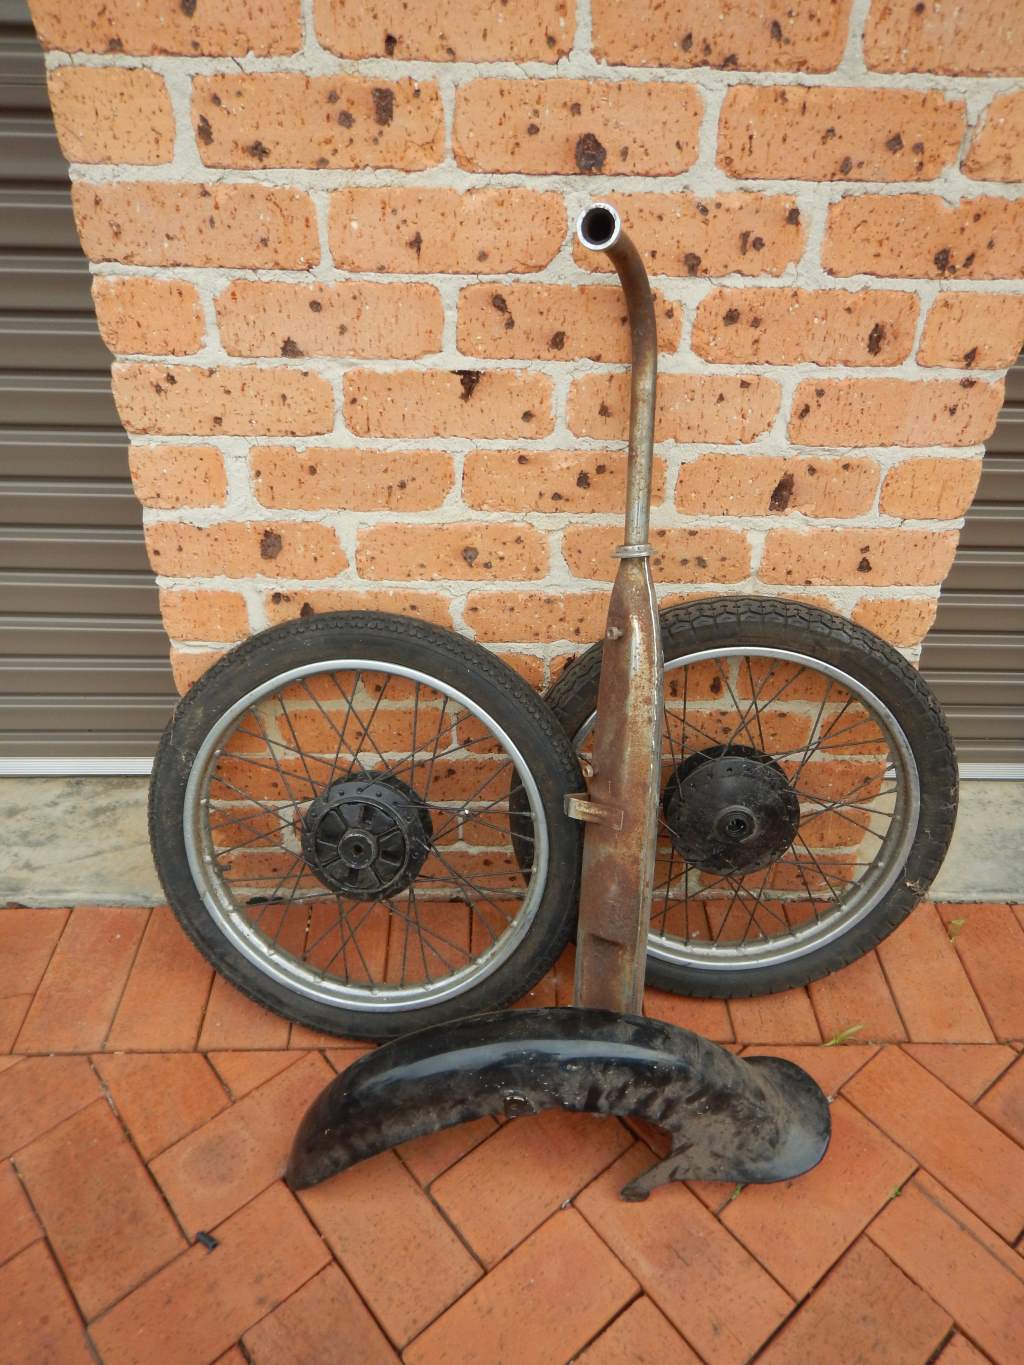
So the bigges thing that has stopped me progresing the little C90 is the rear mud guard. It was completey rusted out and beyond salvation.
This is what it looked like on the bike:
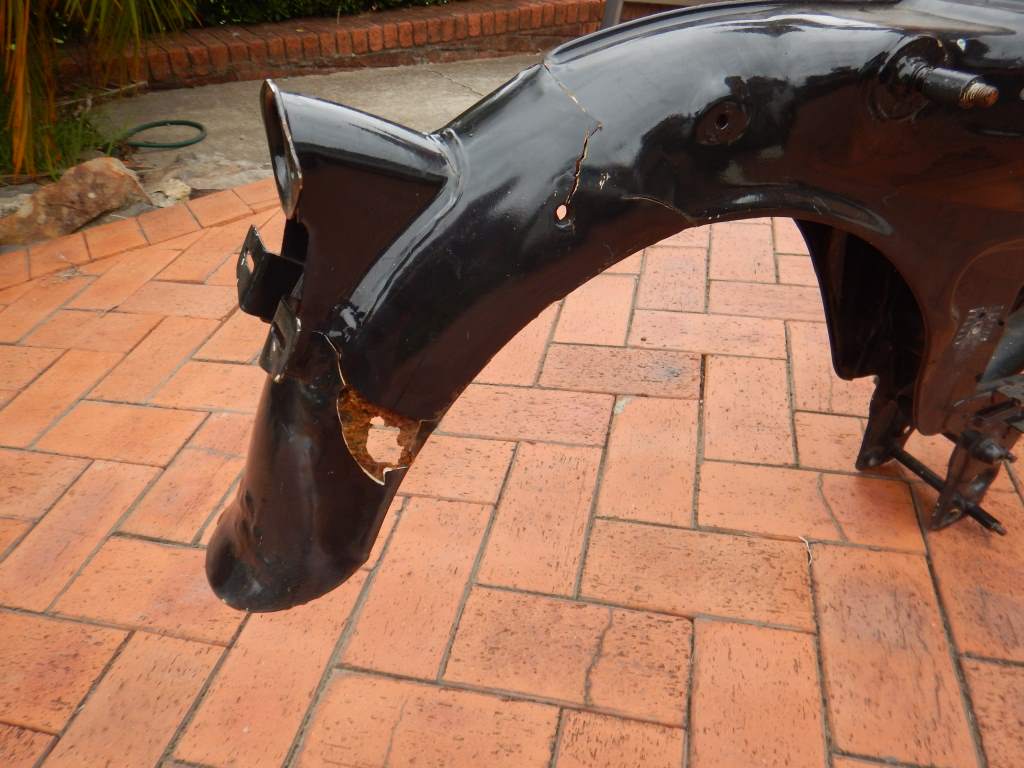
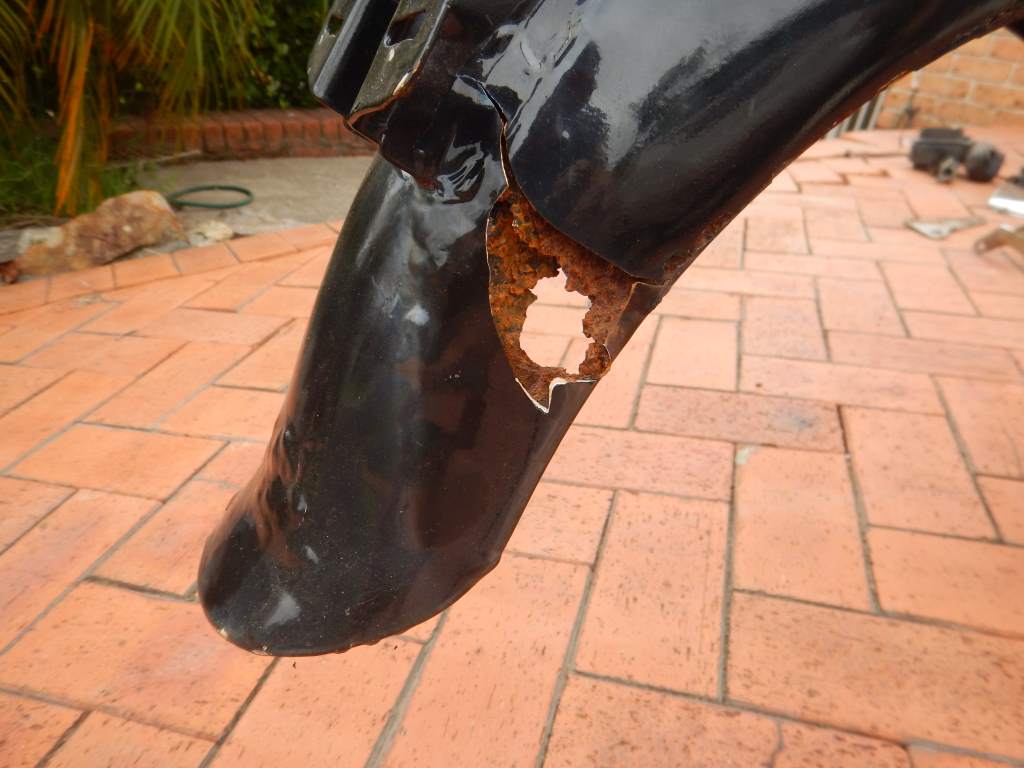
You can see a lot of worrying signs. All the black paint, where it is still in place is wavy and uneven, indicating nastiness underneath. Where the big hole is, you can see there is a ton of body filler, and horrible rust, not to mention that large hole, underneath. To me it looks like it rusted out long ago and the owner just bogged it all up (and not very well) and put black paint over it all. And that concerns me, because as you can see, they've put a layer of thick black paint over the entire bike. Who knows what nastiness that is hiding.
And this is what it looked like after sandblasting.
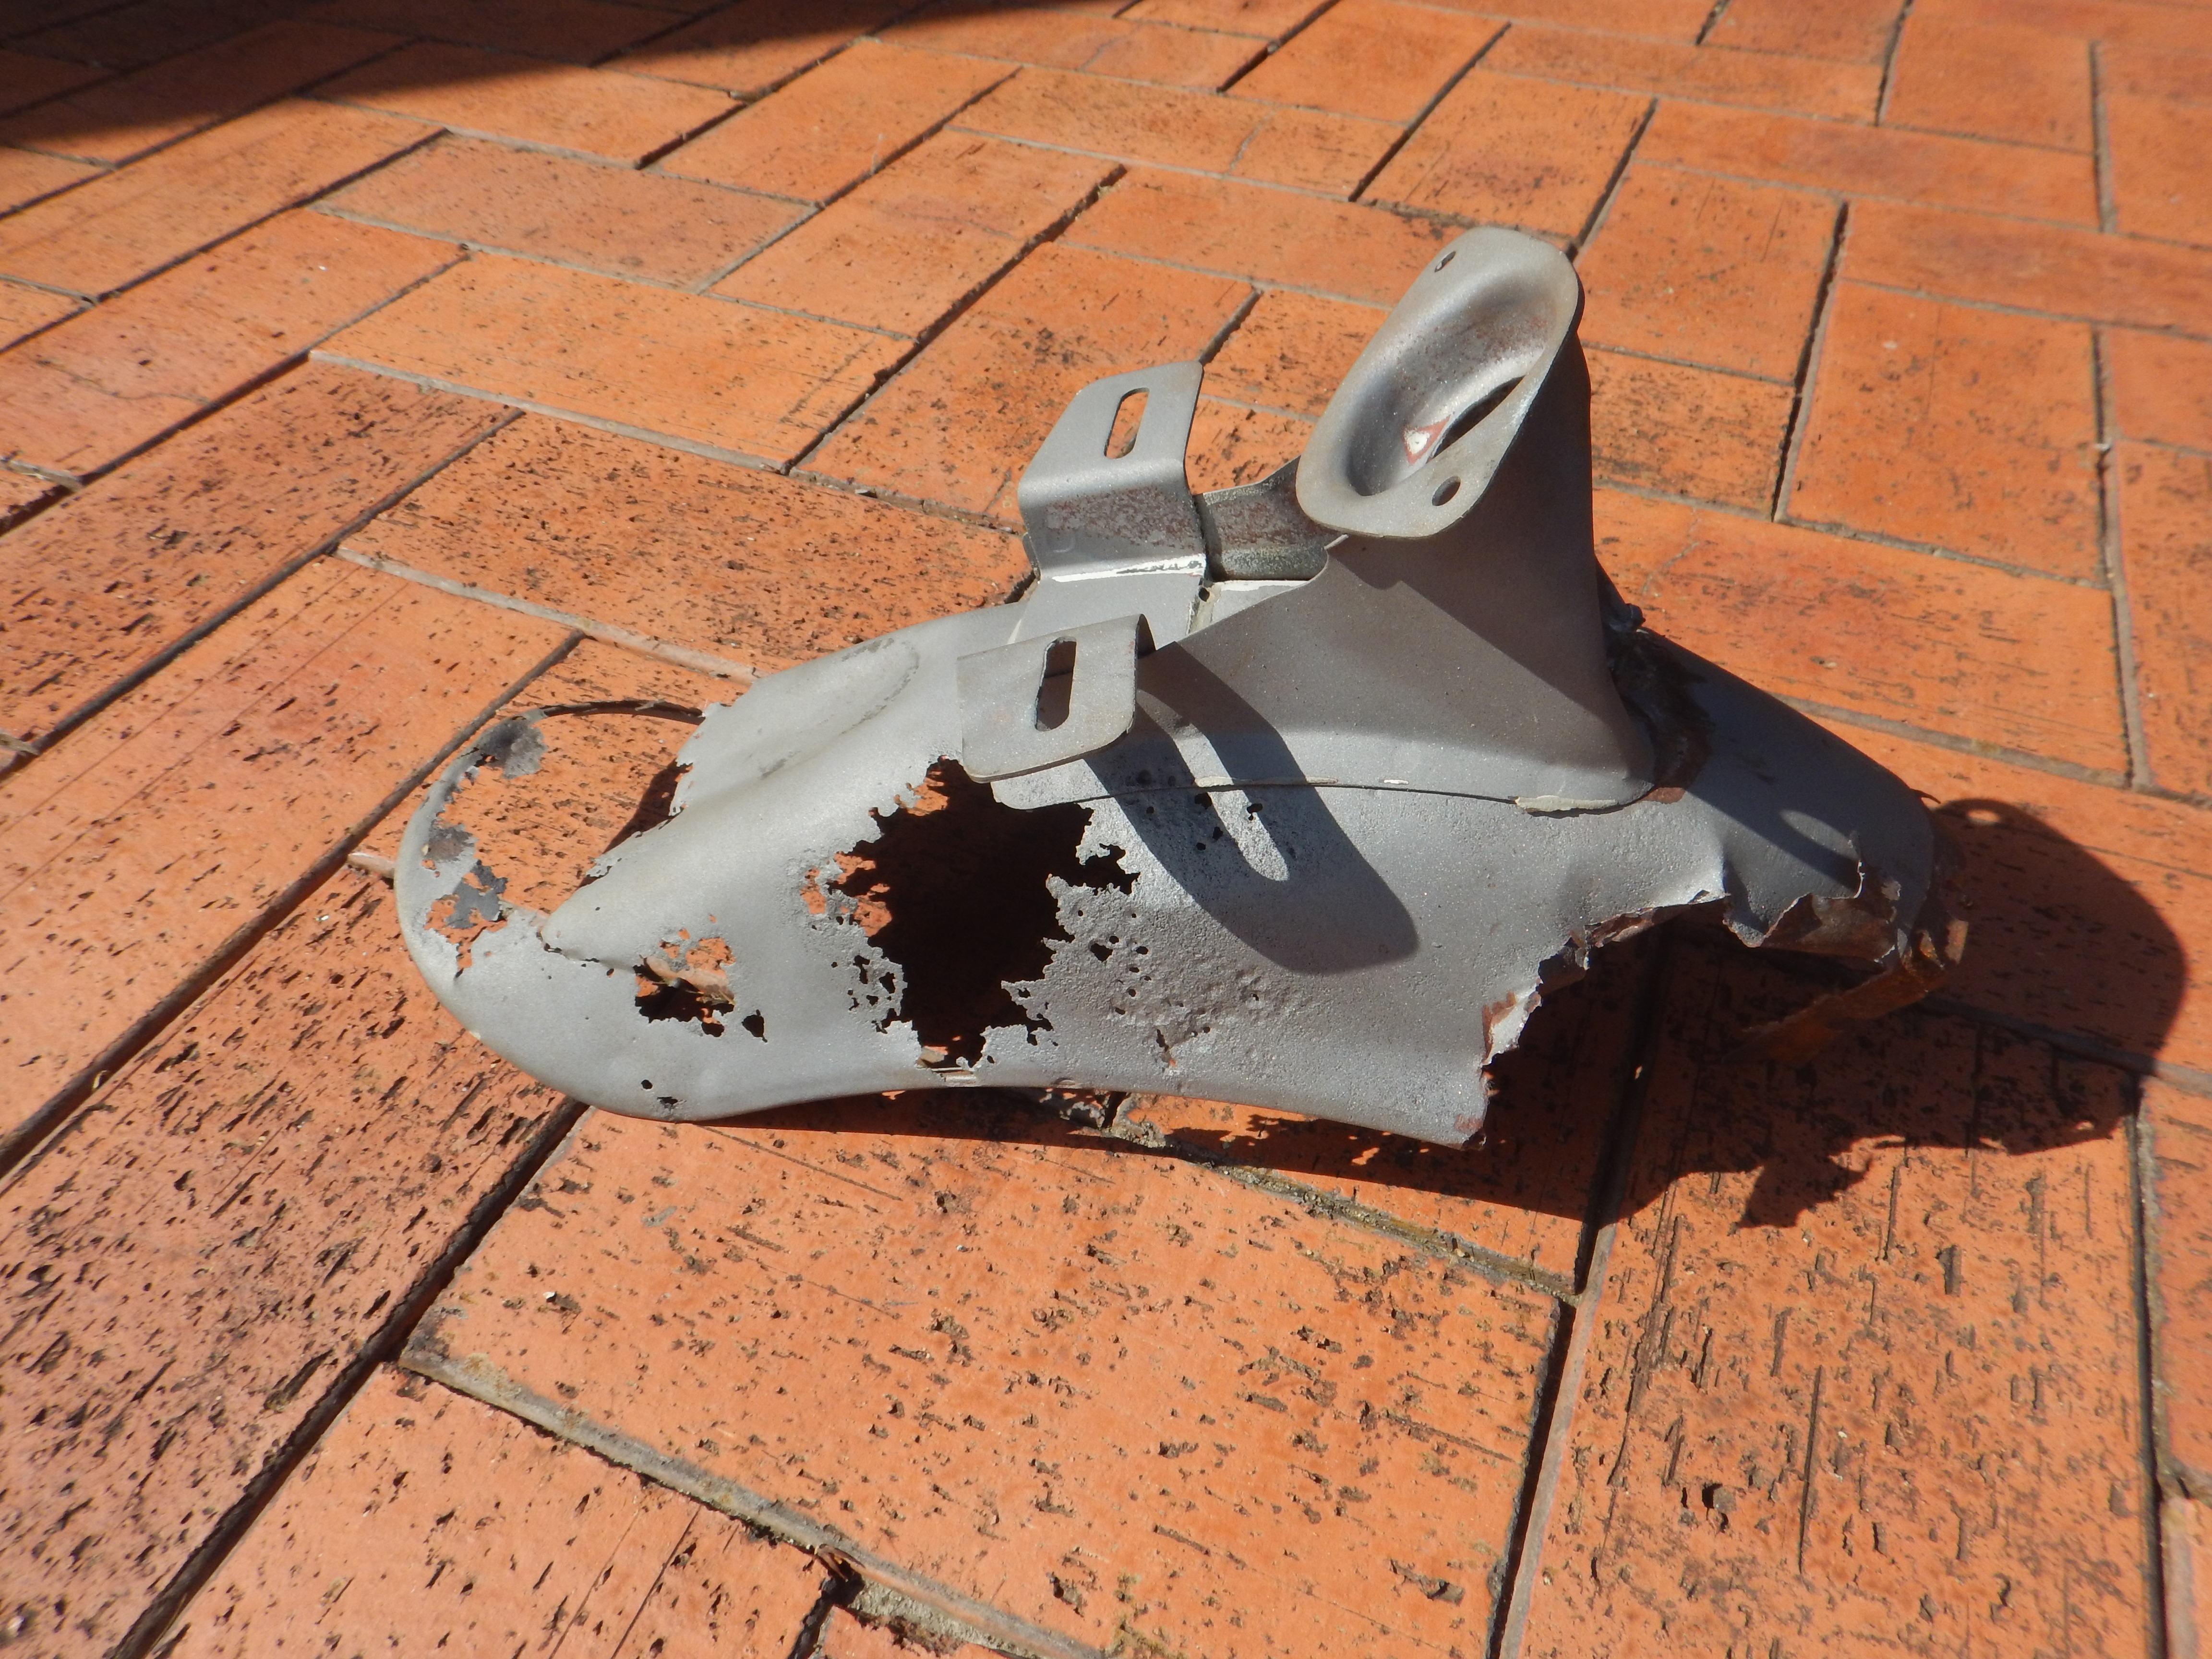
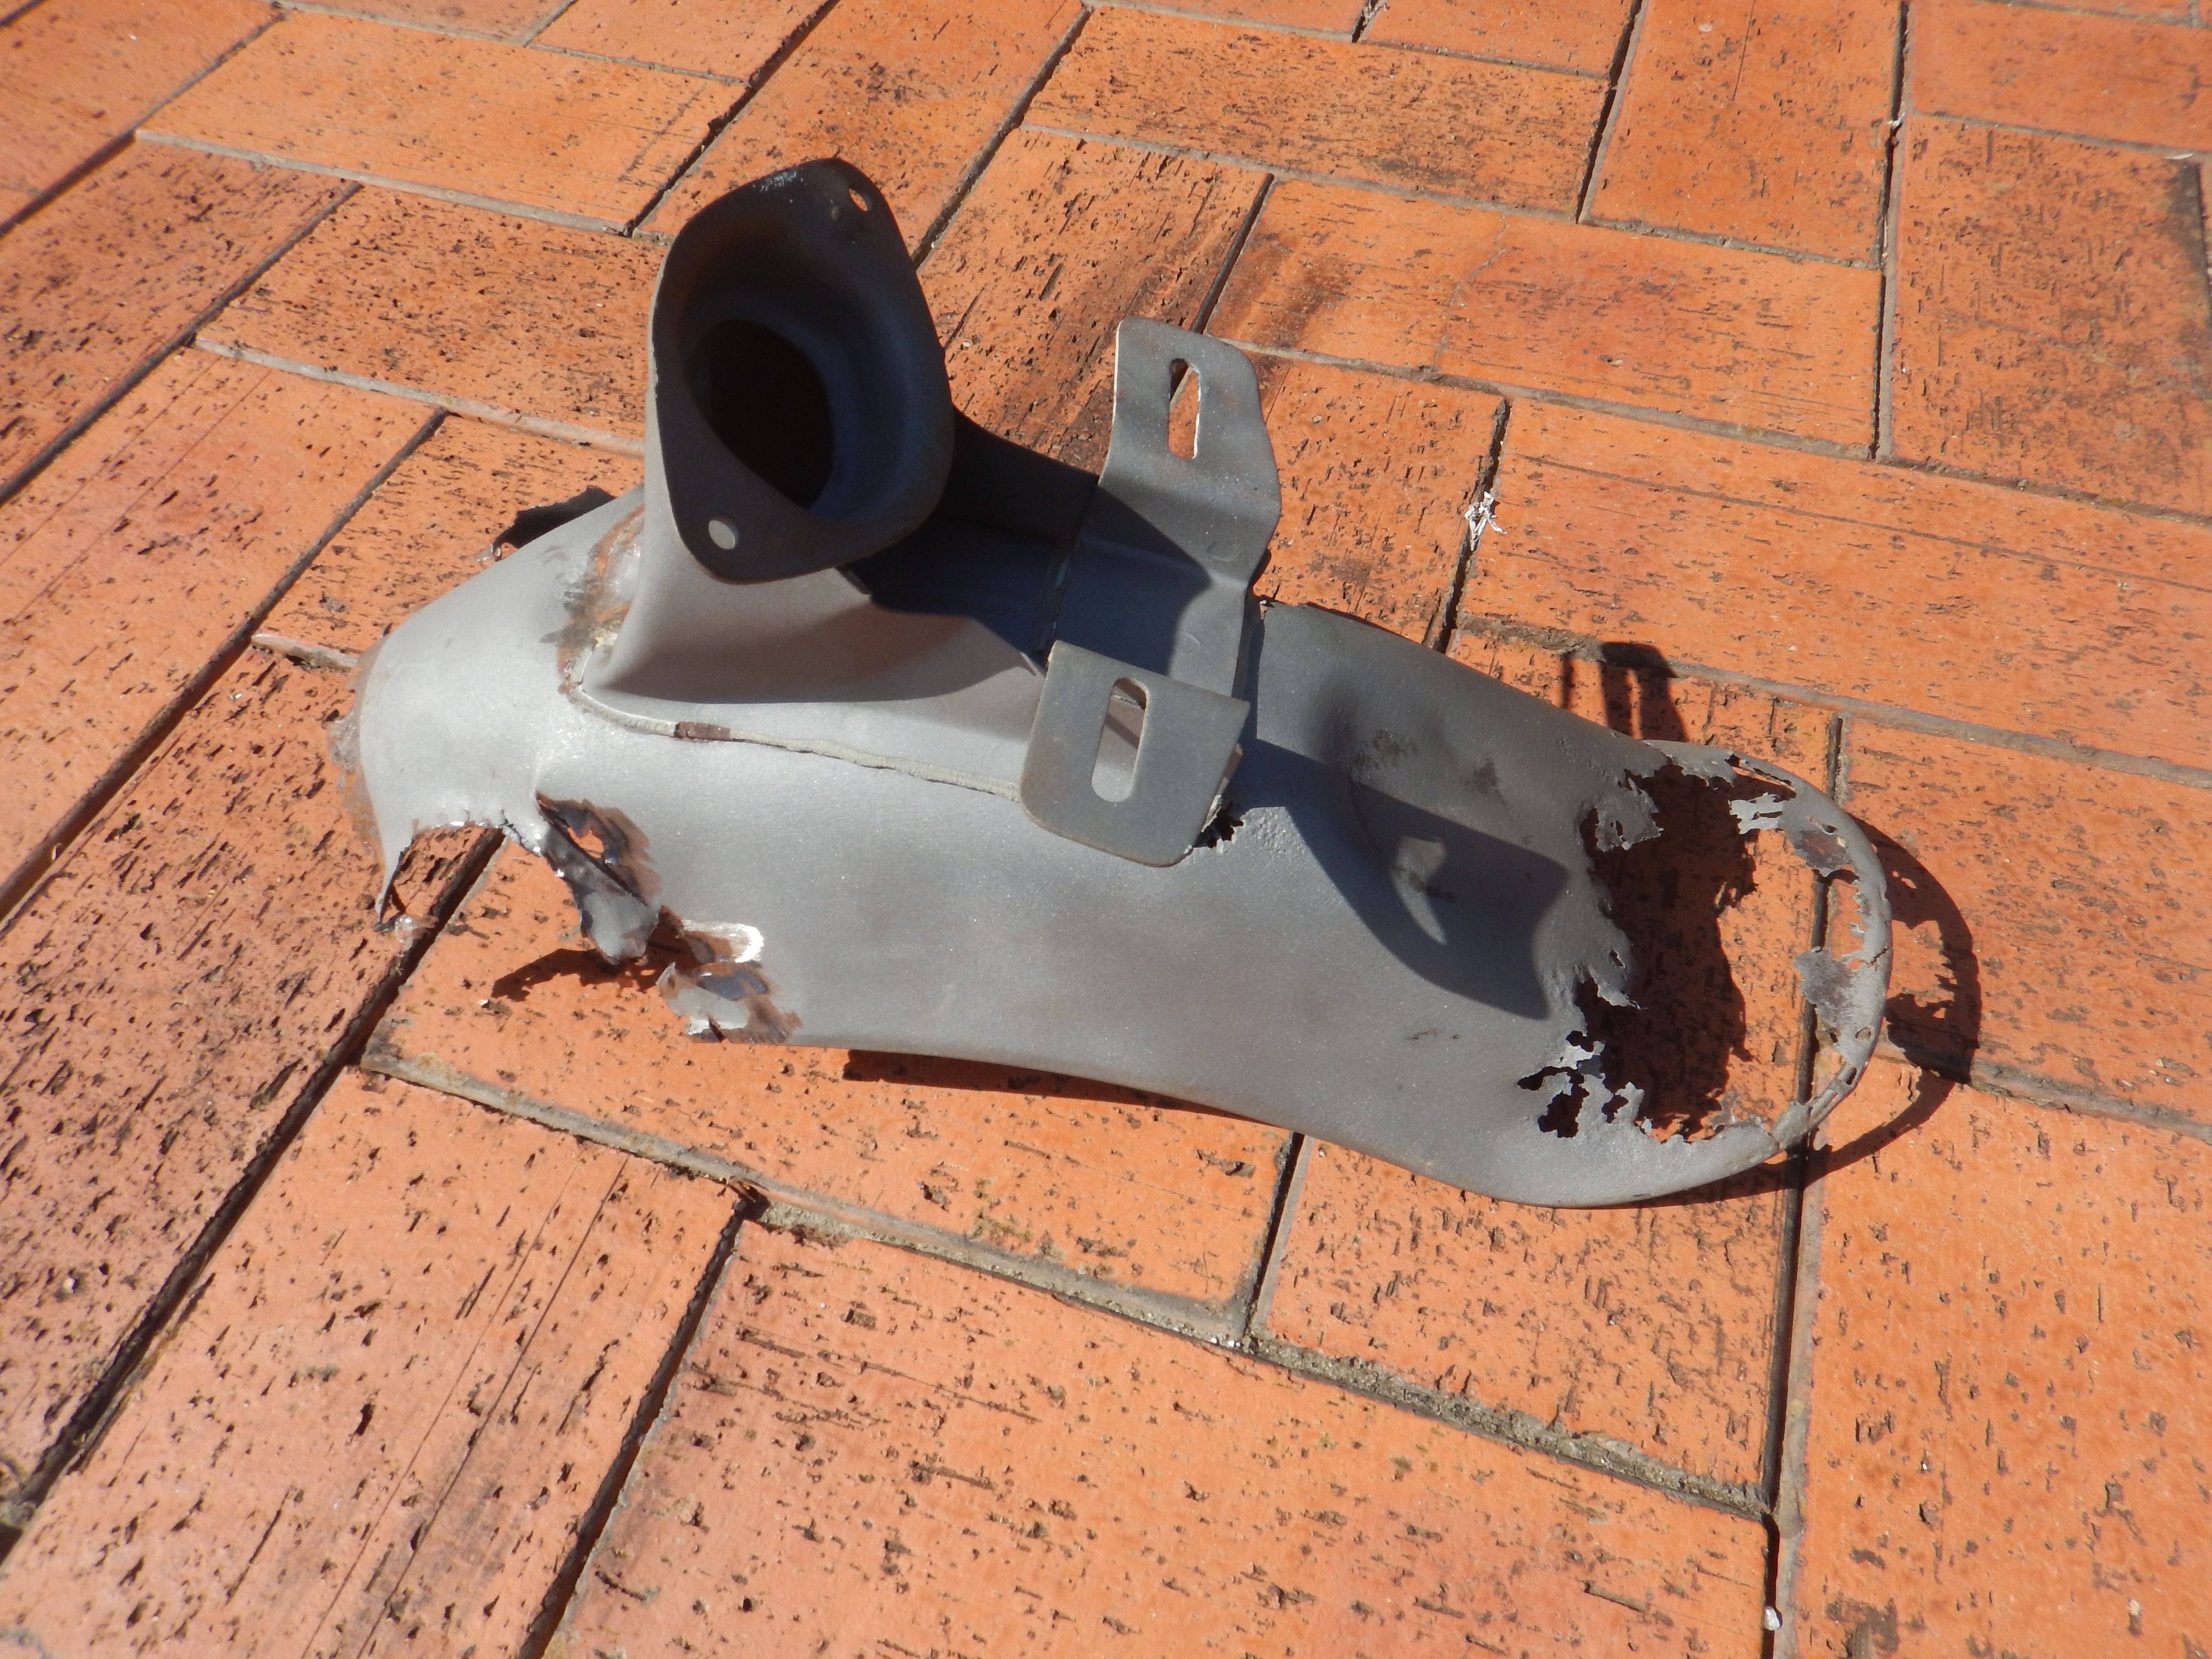
So my fears have been confirmed - the guard is cactus - no way that can be saved. Or at least there is no way I can save that. I'm sure more skillfull people than I could do it, but I can't. For me it seems better to just buy a new guard. I really like to keep things original, but this little bike is nebver going to be original again. The previous owner/s have done a few strange things to it, and Im not going to go to the effort or expense to reverse tehm, so I'm going to have a little bit oif fun with this. I'm not sure what will happen with it yet....but it won't be taken back to original.
So the only thing to do is rip the guard off and replace it.
Buying the replacement guard was easier than I expected - Log On to cmsnl.com - look up the little C90 and a few clicks - job done. Mind you, its got to come from Thailand, so the postage is pretty expensive, but I still go out of it for about $60 (Aussie Money) so thats OK.
Getting the old guard off was a different story - it was spot welded on in the factory and you would think it wasn't that big a job. Wrong! It was a nightmare to get off....drilling, bashing, pushing, pulling, but eventually it gave up and came off, but there were still a few remnants remaining that I had to grind off with an angle grinder. But still, it's done now.
10 Nov 2024
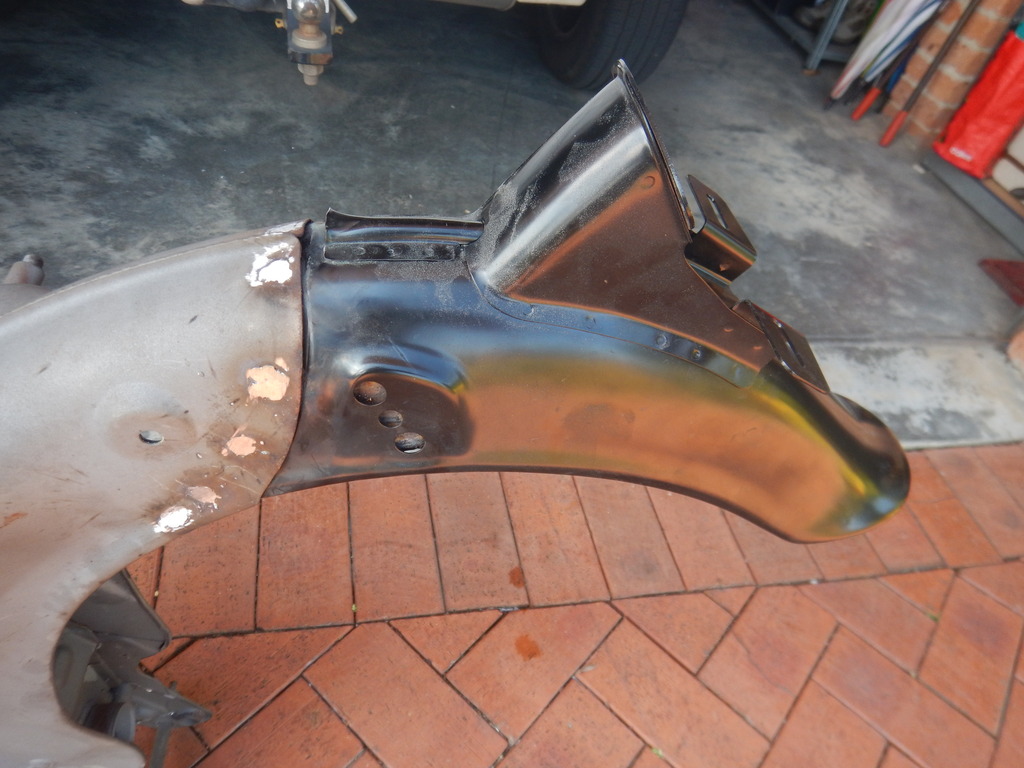
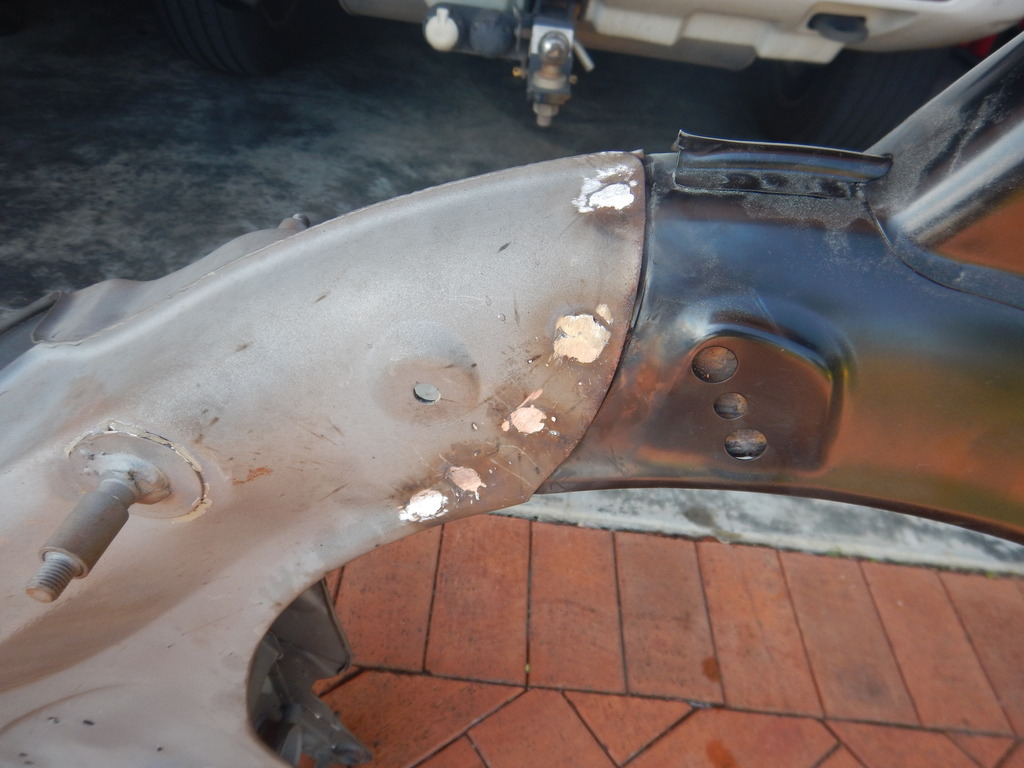
Once the new guard arrived, and the old one was off, I did a little trial fitting to see how it looked. I was pleasantly surprised - it fit quite well.
It's not absolutely perfect, but I've opnly just roughed it out by hand, so I'm confident its going to be an excellent fit.
There guard styule is not exactly the same as the original, but it was as close as I could get. It will cetainly do the job.
6 Dec 2024
I'm not going to try welding the guard on, so I dropped it down to Laurie Alderton's shop down in Smithfield. Lauried and his son Dave know their way around bikes, and I know them to be good people - so i will trust them with the job.
11 Dec 2024
I got the bike back from Laurie today - very pleased with the result.
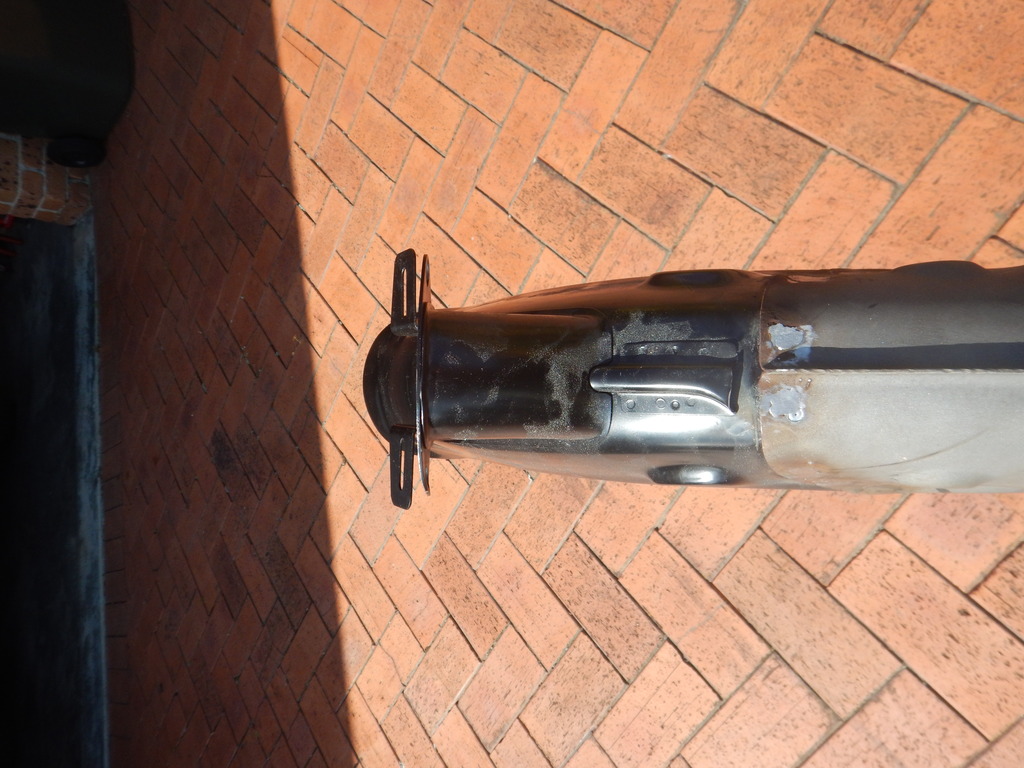

To me, it looks really good. Thanks Dave!! And Laurie.
13 Dec 2024
So now its time to put my thinking cap on. What am I going to do with this little bike??
As mentioned above, its not going back to original, it's already a little too far gone for me to want to put it back. There will be too much expense, and too much effort. And I have another 3 of these that will definitely be getting restored to original, so this one I can have a play with.
You will see elsewhere on this site, that I have a CT90 Engine that I am working on, one of the Hi-Low Range Gear Box Models - that got me thinking (which is always a dangerous thing).
I have decided to do this bike up as a little Army/Military style bike. I think that would look good.
And that also has a number of advantages with the restoration. All the paint can be a simple flat Olive Drab Army Green colour, and that is very forgiving for painting. It shows up imperfections a lot less that a nice glossy paint job, and of course is much easier to apply.
And as an added bonus - I dopn't have to worry about all the chrome - I will simply just black it out.
And the CT90 Hi-Low Range Engine fits in nicely with a Military bike as well. This bike came with two different engines, so I've got a few lying around.
My research has shown that one of the Engines that came with this bike (basket case), was most like the original engine for the bike. And I have a copy of the old Rego Papers (Title), that list the engine number, so I'm going to assume I have the original engine for it. Nevertheless, I am still going to put in the old CT90 Engine (which is a 1971 Engine) to go with the military theme.
When I sell this bike, I will throw in the original engine with the sale. The new owner may want to put it back in.....
Just some thoughts on doing the engine swap - my research has highlighted:
Engine Mounts:
Both the CT90 and C90 engines use similar mounting points, so the engine should bolt directly into the frame without needing mods.
Chain Alignment:Check the sprocket alignment between the CT90 engine and the rear wheel of the C90 frame. If the alignment is off, you may need to adjust or modify the sprockets.
Electrics:The 1971 CT90 engine uses an older electrical system, likely with a 6-volt stator and a specific wiring harness. The 1976 C90 may have slightly different electrical connectors or use a 12-volt system, so wiring may require adaptation.
Ensure compatibility between the ignition coil, battery, and wiring harness.
Hmmmmmm, this may be enough for me not to do the swap.....I don't want to get bogged own in re-wiring the bike. I'm not sure a 6v and 12v system would be happy play mates.
Foot Pegs:On some models, the foot pegs are bolted to the engine case rather than the frame. Verify that the CT90 engine matches the mounting style of the C90 frame.
Exhaust System:The exhaust manifold angle and mounting points might differ. You may need to fabricate or modify the exhaust system for proper fitment.
Gear Shifter and Brake Pedal Clearance:Check for sufficient clearance between the engine's gear shifter and brake pedal. Some differences in frame geometry could cause interference.
Carburetor and Intake:The carburetor position might differ between the two models. Ensure the carburetor clears the C90 frame and connects properly to the air intake system.
Dual-Range Sub-Transmission (CT90 Specific):If you use the CT90 engine, its dual-range sub-transmission will remain functional, but it's designed for off-road use. Be mindful of the gearing differences compared to the C90's setup.
Final Thoughts:While the engine will physically fit, minor adjustments to electrics, sprockets, and peripherals might be necessary. If you're comfortable with some tinkering, it's a doable swap that could give you a unique hybrid bike!
16 Dec 2024
Even though I have not put much on this web site, I have done a few little bits and pieces over the years.
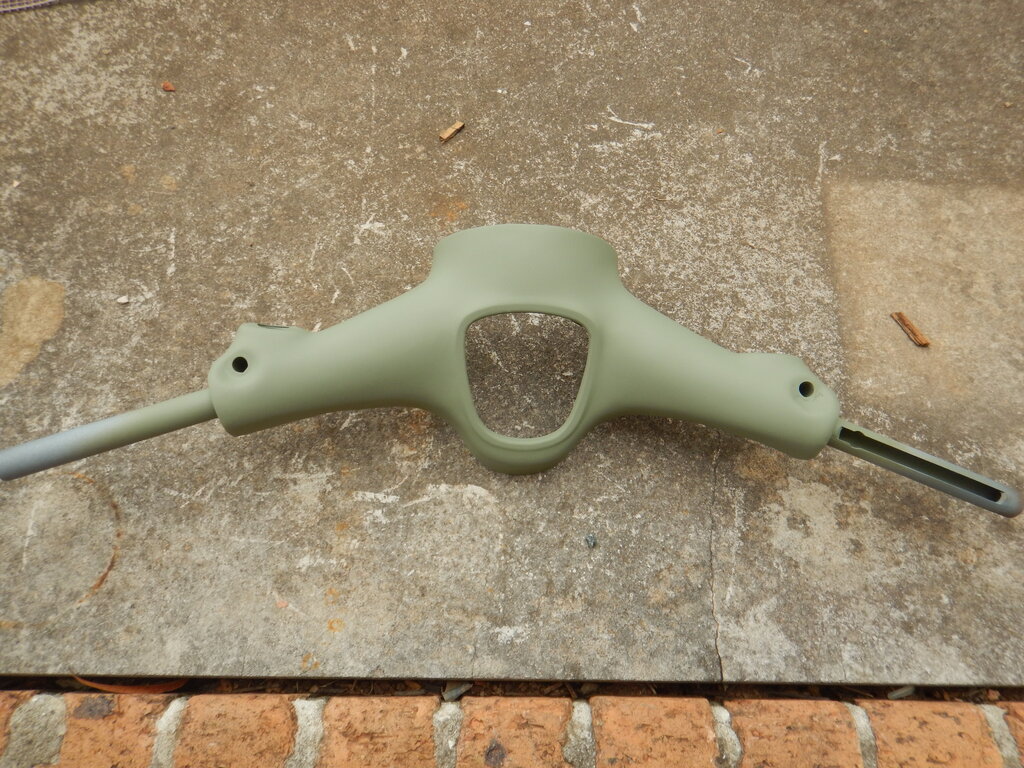
I've had the frame, handlebars and a few other items sandblasted.
Anything sandblasted has been given a coat of etch primer.
18 Dec 2024
I've begun to turn thius little beast into a Military bike. So it's slowly turning Olive Drab.
I've also started a little bit of panel beating and body filling where the new rear guard joins to the frame.
Check out the progress.....


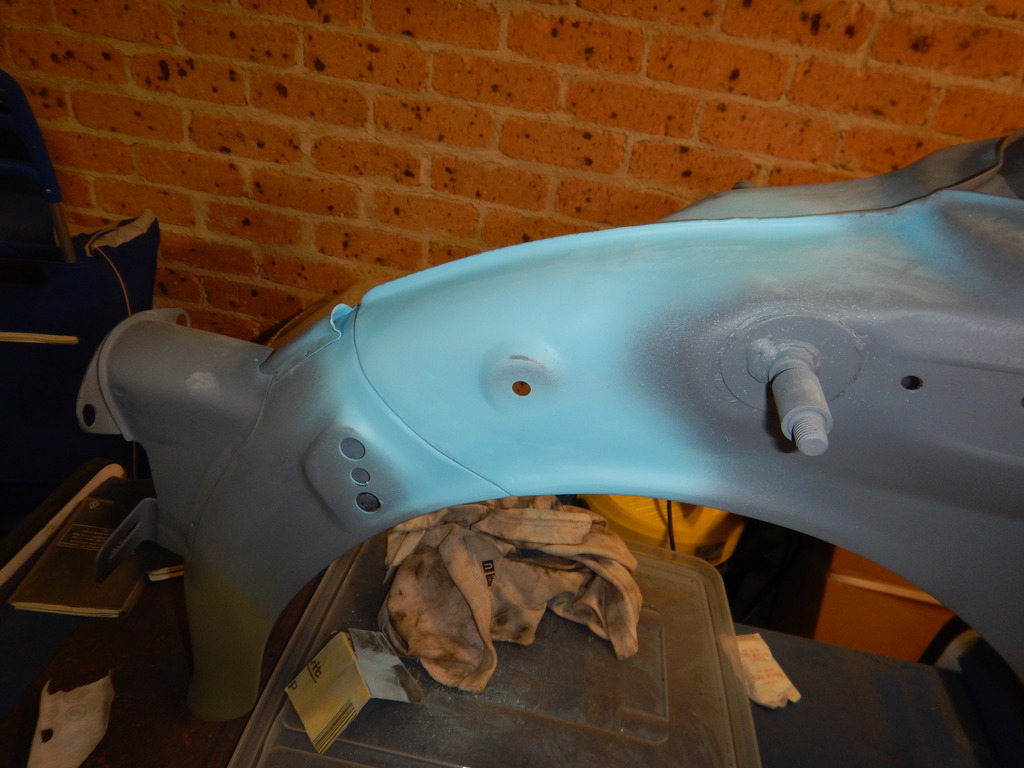
I'm pretty happy so far.
You'll notice the petrol tank isn't finished. There was a little "incident" with that. It was all nice and painted, it looked really good, and then I thought I'd give it another coat of paint. Trouble was my spray can was empty so I started a new one. The paint was so old, and had been lying around so lont, it all came out like crap and ruined the nicely painted tank. I played around with the paint can, shoook it for about 15 minutes, heated it in hot water, shook it some more and it started coming out well again, but the damage had been done. I had to strip the tank and start again......
I've got to admit I'm enjoying getting back to the bikes and Engines and hobbies in general - work takes up too much of our lives.
I think I am going to enjoy retirement.
14 Feb 2025
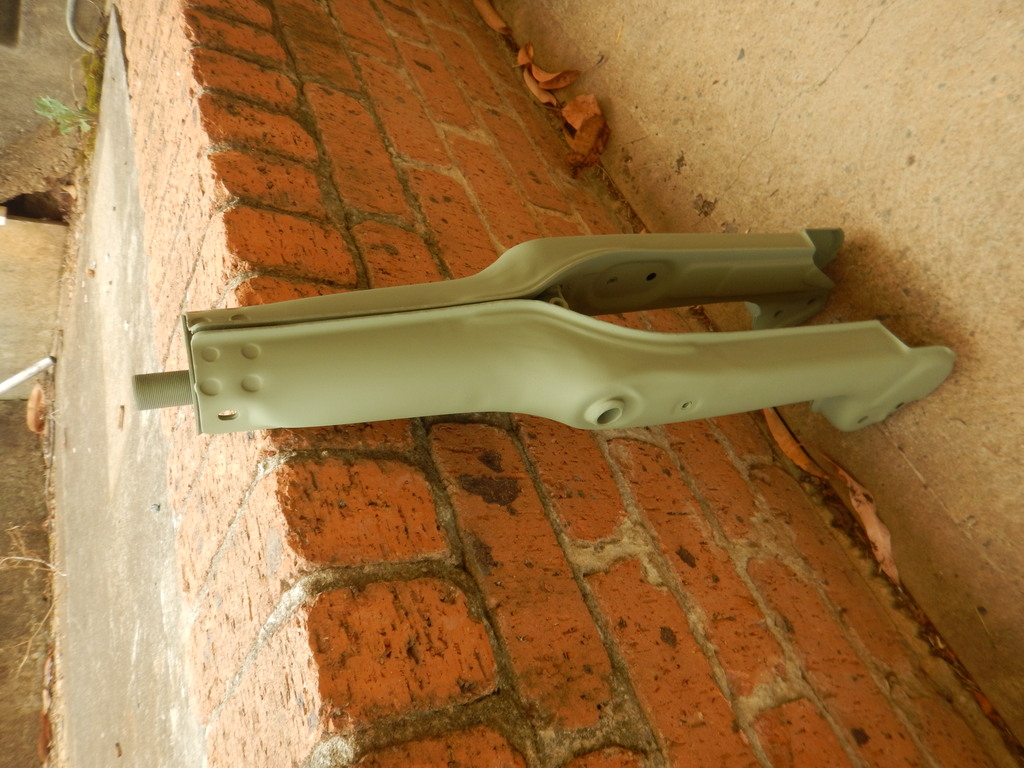
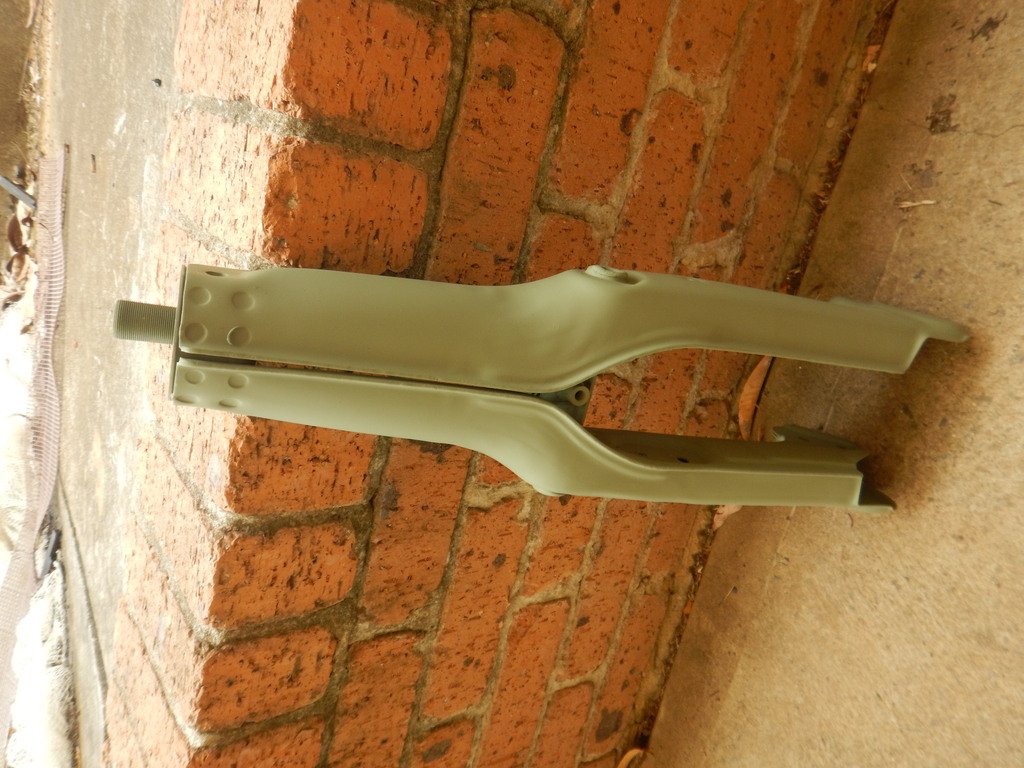
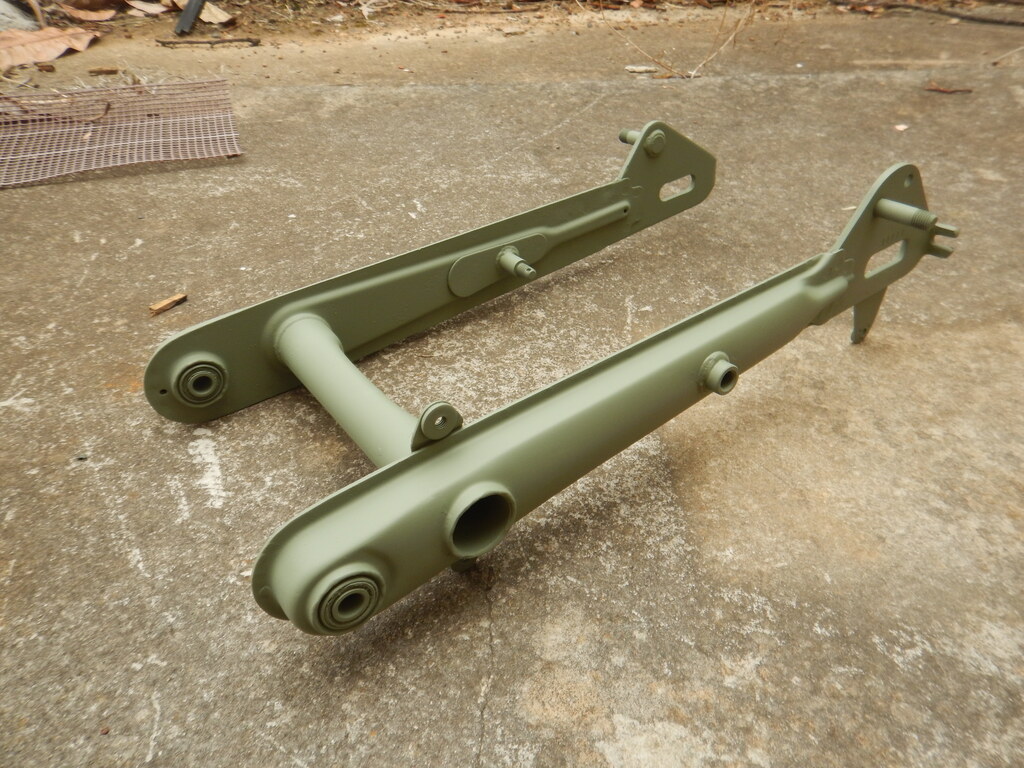
The entire frame is painted now, along with the front forks and rear swingarm and fuel tank, so its ready to go back together.
The next step is to clean and polish the steering bearing races and ball bearings. I've started having a look at these and I think I've lost a few ball bearings. I have 39 in total, which would mean there are a different number in the top and bottom races - that doesn't sound right..
I looked up the parts manual, which says there are supposed to be 21 balls in each, so I obviously need to buy some more. They are 3/16 inch balls so its off to the local bearing shop..
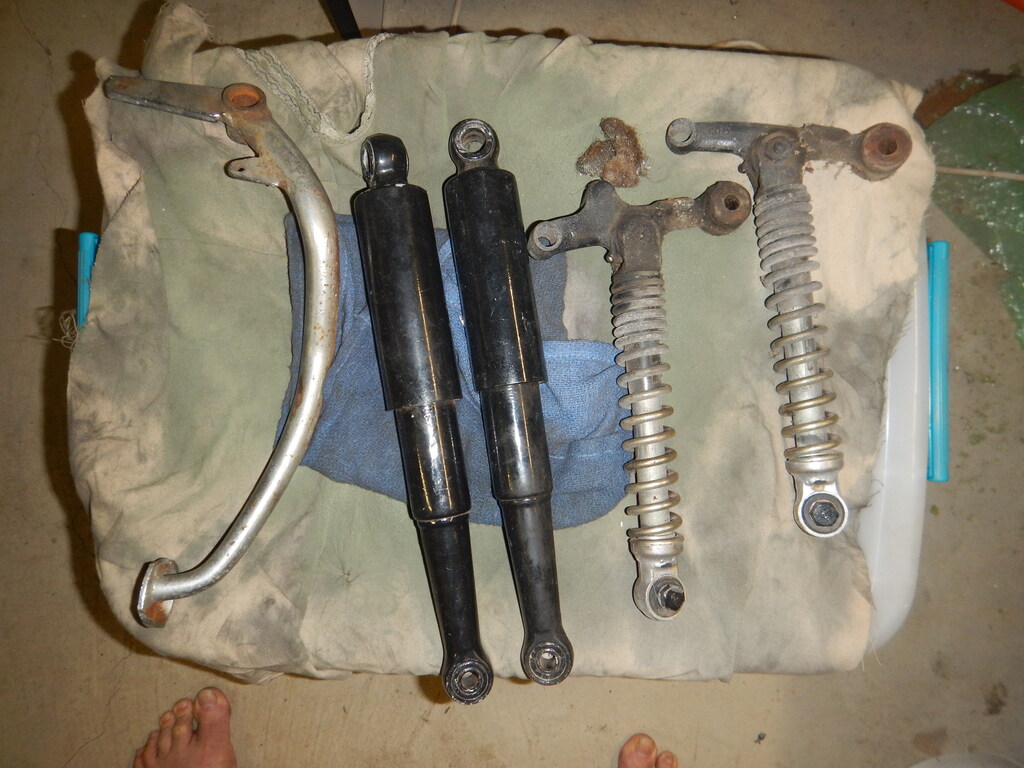
Now.......onto the suspension.