1976 Honda XR75
What can be said about the mighty Honda XR75?? What a bike - it probably started more people riding than any other single bike in History.
.png)
28 August, 2005:
Well after 30 years I've finally got one!!! A Honda XR75. How cool is that??!!?!
I guess to a lot of people that doesn't really mean much, but I bet if you are reading this, then you can also feel the excitement I feel when thinking back to those carefree days of minibikes and the local quarry. Long before the worries of taxation, families, jobs, bills etc. Back in the days when all we really had to worry about was getting mum or dad to give us a couple of bucks for petrol. They were grand old days, and to me, and doubtless to lots of others, those carefree days are best reflected in our memories of our minibikes. But I digress......
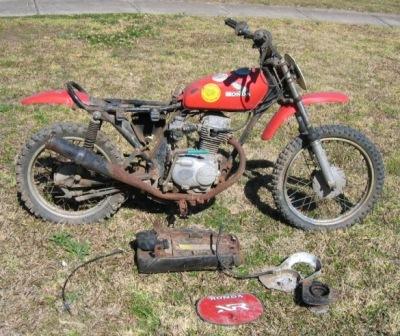
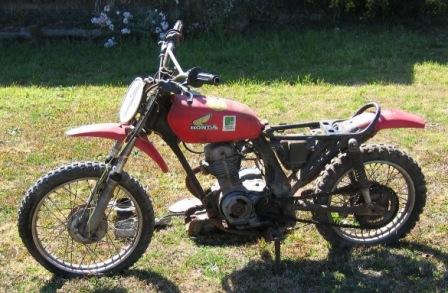
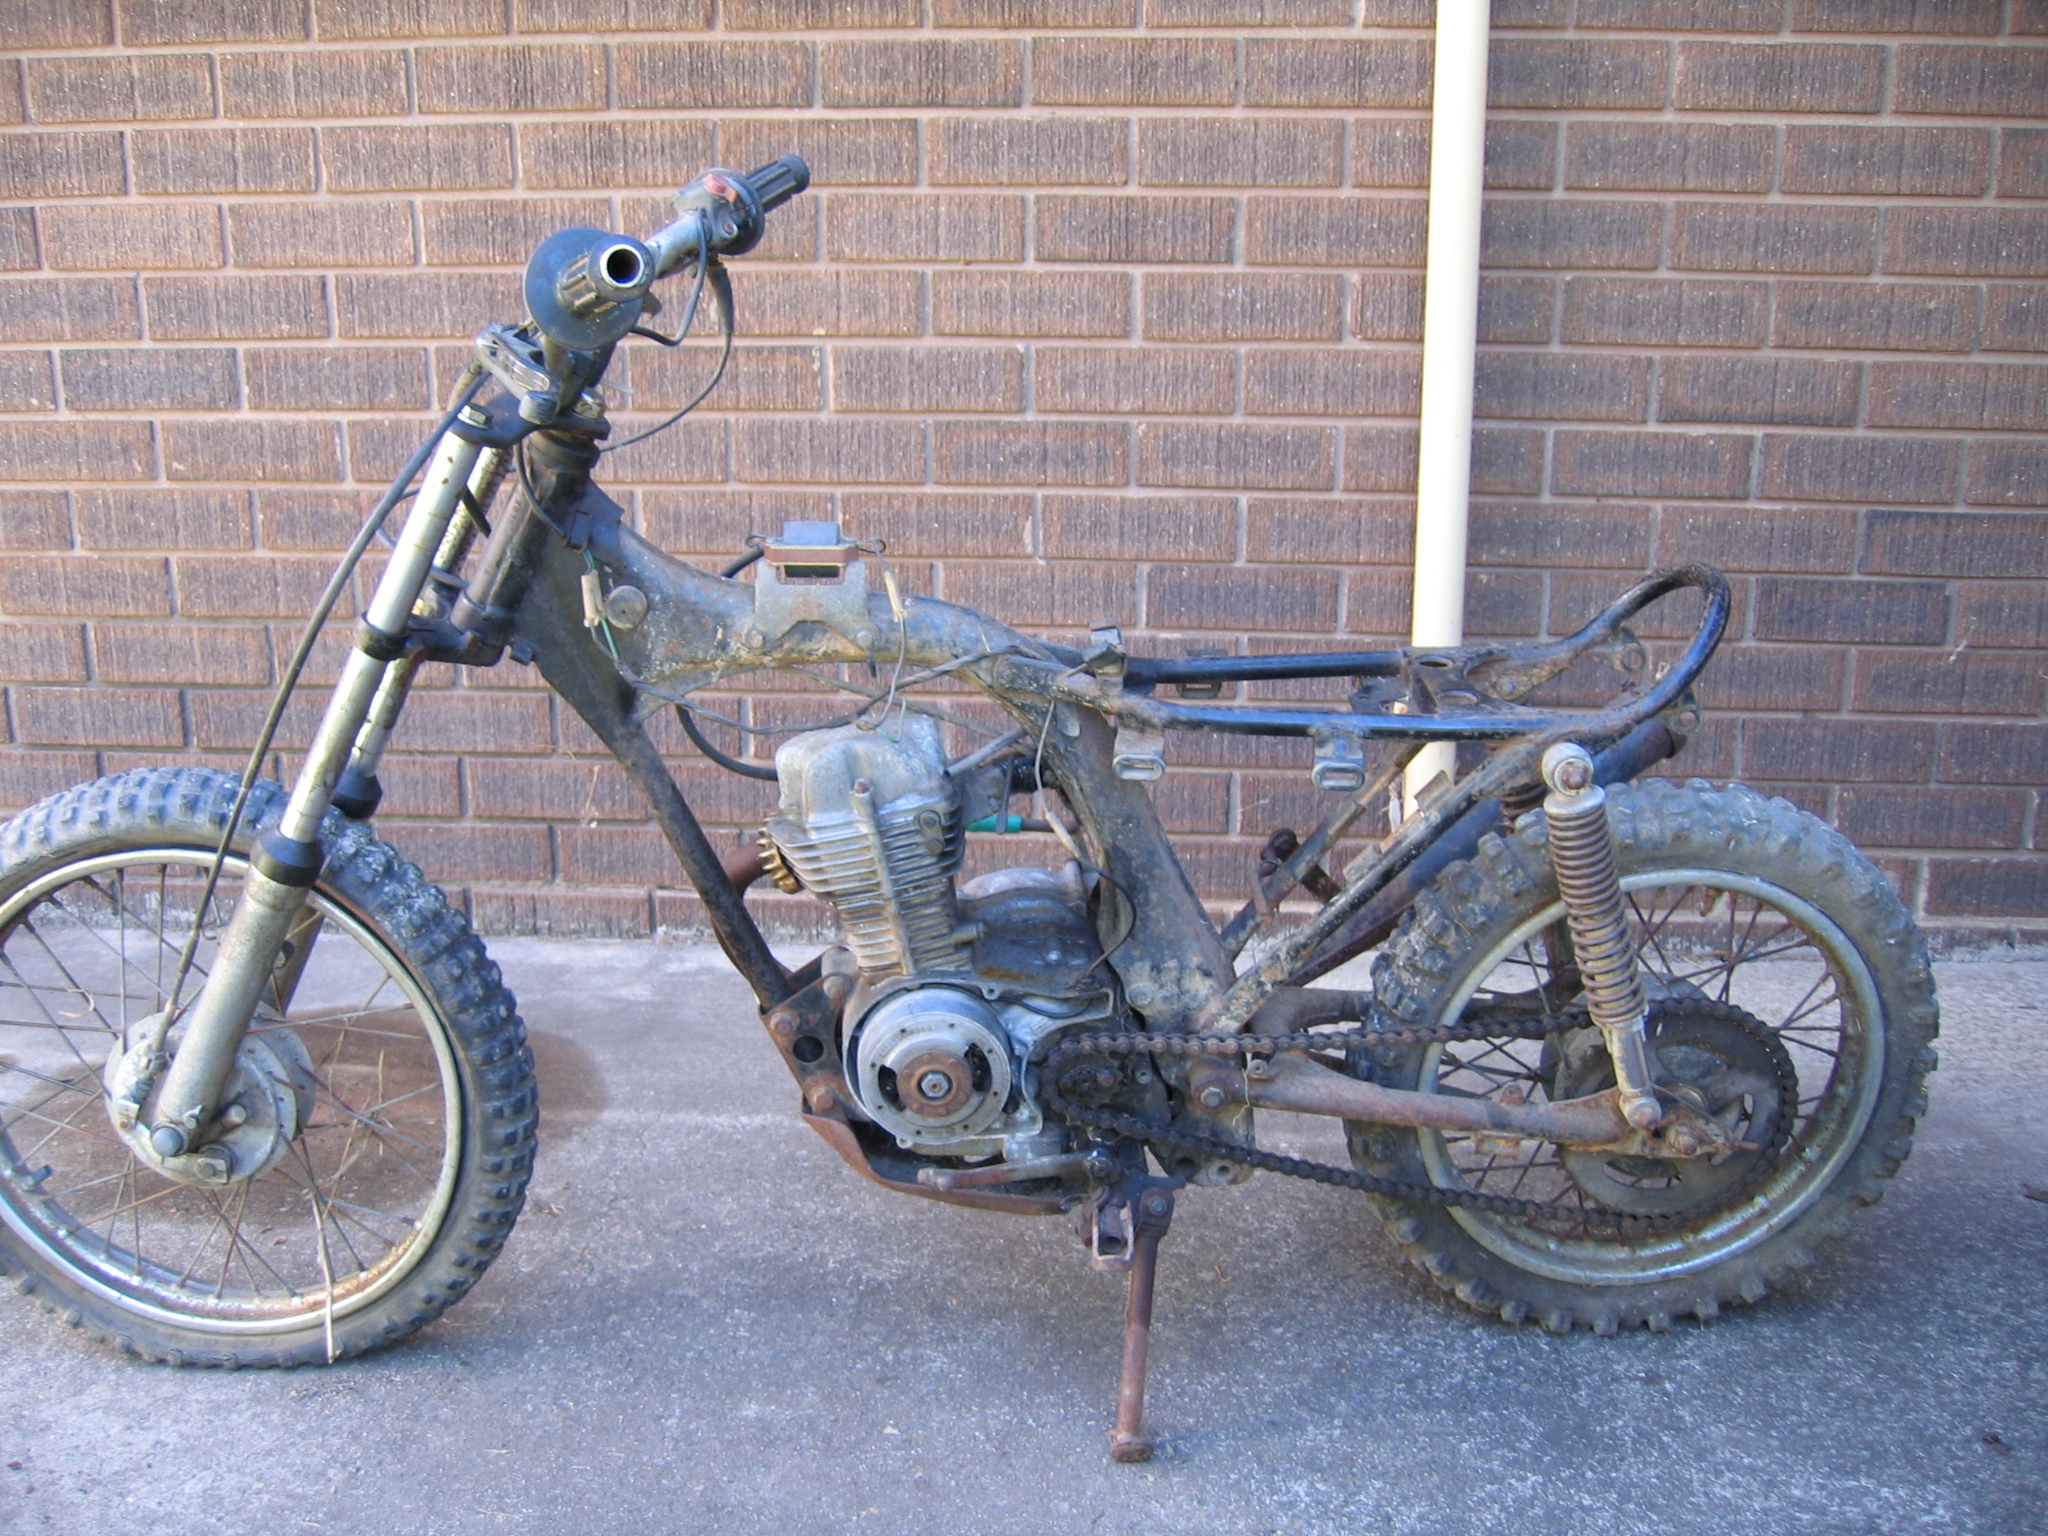
My "new" XR75. Its actually 30 years old this year, its a 1976 model. Of course its showing its age. You'll see from some of the "before" photos that its probably worse than "showing it's age", it's showing MY age. Which is a darn site more than 33 years let me tell you.
And how did I come across this little gem?? Well the truth is, I can't remember exactly. And that is not nearly as shonky as it sounds. I do remember I went around this guys place. He was a fireman, but for the life of me I simply cannot remember how I met this guy and found out about his motorbikes. Anyway, at his place I was looking at the little XR, and he was selling it "cheap" he said, but I didn't really know how much "cheap" was going to be. While he is showing me the bike, his good wife came out and gave him a ton of grief about "those bloody bikes" and how it was good he was getting rid of them. "Them????" I asked?? he took me to another corner and there was a little Honda MR50 and a Yamaha YZ60. To make his life easier, he said I could have all three for $100. SOLD!!! None of them were running, but I was after the XR to restore and hey, for $100, who could refuse the other two, I would have happily paid up to $300 just for the XR. So I was happy, wife was happy, and of course when wife is happy, fireman is happy. We all win..... :)
So now that I've finally got it home I need to restore it.
About my only guidance on this project is a book by Mark Zimmerman and Jeff Hackett, "How to Restore Your Motorcycle". I ISBN: 0-7603-0681-8. From first few readings it seems to be pretty good but I guess the proof is in the pudding so to speak, so this project progresses, I'll let you know my comments on the book.
You can see from the photo that it is fairly rough. I know for a fact it wont start, and in fact the kick starter won't even kick through its whole range of arc, so things insid ethe cylinder sound a bit dodgy, ie seized.
Tuesday 4 April, 2006:
The disassembly started in earnest today. Over the past year or so I have been gathering many of the things I thought I would need to do the little XR justice. Things like a complete Parts Catalogue on Microfische, an official Honda XR75 Workshop Manual, photos of the original model I have (1975 K2). I got them all arranged, started reading up on a few things and just generally prepared.
The time had to eventually come.....the disassembly began. Slowly at first. Today I organised a workspace and set up the bike ready to go.
Where to start? I wanted to do this right, so I figured a great place to start would be with a thousand phtographs of the bike the was it was, just in case I happened to forget what goes where. So out with the camera and photograph everything that may be of value later, once I was trying to put it all back where it belongs, and of course a good many just for posterity.
But then it was time to stop pfaffing around and get out the tools. A very slow start:
- Removed front brake cable
- Removed clutch cable
- Removed left side hand grip
I don't have a glorious history of mechanical success, so I have resigned myself to do this one very carefully, very precisely and without any time pressures at all. If I can't get that part off today, well that's OK, no need to get the hammer out and bash it off. I know from experience that only ends up with a broken component. No, there would be none of that, this whole process would be done clinically and with precision.
Saturday 8 April, 2006:
Once the front brake and clutch were dis connected and the lever assemblies removed, the next logical step was to remove the handlebars.
In hindsight, I probably wouldn't remove them at this stage again, because there is esstentially still a complete motorbike there, and moving it around without the handlebars is not as trivial as it sounds. But then again, hopefully next restoration I will have a proper workshop set up with the bike clamped into a bike life or similar.
Suffice to say I don't have that now, and I removed the handlebars at this stage without too much fuss.
I know it sounds childish, but I guess like most blokes, Im still a kid at heart. But by now, blissfuly working away on my XR75, my very first restoration project, I had removed the brakes, clutch and handlebars and had not broken anything, so I was feeling pretty good about life!
Monday 10 April, 2006:
So what next??
The exhaust I guess.
You hear so many horror stories of exhausts welding themselves and/or their collars to the head I was sure mine was going to be a nightmare. In the end, I shouldn't have worried.
I unwound a few bits of old wire that were being used to secure the exhaust to the frame and foot-peg mounts and then the only other thing left was the exhaust collar at the head. It is held on by two 12mm nuts and these were the ones I was dreading. Bearing in mind my new found patience and "do things properly" attitude, I was determined not to simply attack these nuts with my biggest shifting spanner. I got out my socket set and had a little bit of a feel. The nuts were fairly corroded, so even my good quality sockets were not sitting terribly well on the nets.
As an aside, I learned quite a few years ago to always buy the best tools I can afford. When I was a kid, I always used to buy the cheap and nasty 1/2 inch and 2/3 inch combination socket sets you can buy in the local junk shop for $10. I used to use them to death, lend thme to people, lose them break them and when I needed a new set, another $10 and I was off again.....I just couldn't figure out why all those other "idiots" would spend hundreds of dollars on a socket set. Well the inevitable happened, one day I needed a socket and my old $10 set was missing that socket. No worries, I'd just go buy another $10 set. but of course I couldn't find any of the $10 sets anywhere, and I needed them that day, then and there. I did find a $125 Kinchrome set though. It was the same set, that is, the same sizes, same extension shafts 1/2 3/8 inch drives etc. I begrudingly paid the $125 and went home and got stuck into my CR125. What a different world opened up to me. I had never used a good tool before (behave!!!) in my life and now that I had one in my hands, things happened so much easier, things I could never undo came undone easily, no more stripped nuts, no more smashed knuckles from sockets slipping off nuts. There was a world of difference. That afternoon, I swore to myself I would never again buy crap tools, and with only a few exceptions, I never have. And another side effect, since paying $125 for that socket set, I have never ever lost another socket. I take care of them and clean them after every use. I am sure I would have spent way more than $125 if I had continued buying those crappy $10 sets.
So back to the exhaust flange nuts.
Even though I had good quality sockets, they weren't seating
well on the nuts because they were so corroded. I gave them a bit of a tweak,
with a moderate amount of pressure, but they didn't budge. Remembering
my "Don't break it you idiot" instruction to self. I decided to leave
it alone for a while and give it a damn good drenching in WD40.
I bathed them in it and returned in about an hour and gave it another try, again with no success. More WD40/ I dreneched them every 15 minutes for a couple of hours and then left them sit for about 2 or 3 more hours.
When I returned, lo and behold things started to move! I put a bit of pressure and I was greeted with that nice satisfying "crack" one hears when a locked nut breaks free. Of course I first paniced and thought it was the crack of the exhaust studs snapping in half, but no that was not the case.
The first one was a bit tight, but not insanely so. It came undone without too much fuss. As I wound the nut off it felt a bit tight the whole way out, but I just put that down to a dirty/rusty thread on the stud. When it actually came off though, I reaslised why. I wasn't screwing the nut off, the nut was stuck fairly tight, I was screwing the stud out of the head. Oh well, that's not too bad I thought, they'd have to come out eventually. But I am left with the nut suck, effectively rusted I guess, onto the stud, and now with it out of the bike it will be a bugger to remove. Oh well - thats a problem for reassembly :)
So then onto the second one. To my surprise this one came off even easier than the first!!! But of course this time the nut came off and left the stud in the head. Really easy :)
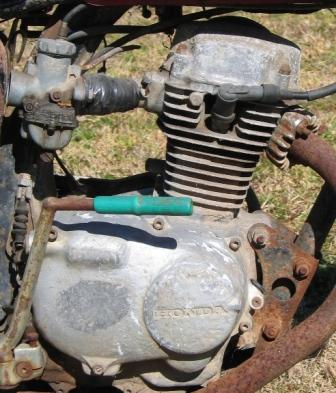
So I took the exhaustoff and had a look into the exhaust port. YUK!!! There was a heap of crud and carbon and oil and who knows what else. You may remember that when I first started restoring the bike, it was "mildly" seized and I poured a fair amount of WD40 and engine oil down the spark plug hole. I'm guessing that a lot of this muck is from the stuff I poured down the hole. All the oil and WD mixing with years of carbon build up. Anyway, obviously I'll give it a good cleaning before getting it all back together.
So then I had the exhaust off, but one stud still stuck in the head at the exhaust port, and another two at the inlet manifold. Hmmmmmm....what too do?? How do you get studes out of heads??
I've read lots of things saying that it is REALLY easy to ruin your day by destroying the soft alloy threads in the head with the hard threads of the studs. This sounds like the type of thing I would normally do, so I really wanted to proceed with caution here. I read somewhere that to remove studs, all you have to do is put two nuts on the stud, and then wind out the inner of the two nuts. The theory being that once that nut locks up against the outer of the two, as you wind it, it winds out the stud. So I tried that. It didn't work though. Both nuts simply spun off the end of the stud. Hmmmm. I was stuck. How to get these things off.
Of course, being the idiot that I am, I couldn't help myself, out came the vice grips!!! I locked them onto the middle section of the stud that is not threaded and spun. Not even close! It just spun around the stud. Even an idiot like me could see that if I kept this up I definately WAS going to stuff up the whole thing. So like the true coward that I am, I put the bike away for the night and decided to do a bit of research.
Tuesday 11 April, 2006:
As you may recall, in the last episode of this gripping adventure, I was stuck trying to remove the 6mm studs from both the exhaust outlet and the manifold inlet.
In the meantime I dropped an e-mail to Steve from Classic Cycle Works,
Knoxville, Tennessee, asking his advice. He gave me acouple of ideas,
firstly, I could try heating up the head and backing out the studs, or
I could buy a Stud Extractor!!! (Edit:
2009. As it turns out Steve from Classic Cycle Works ripped me off and
took my money (long story) suffice to say I would never trust him again)
I didn't even know there was such a thing as a stud extractor! I learned long ago that I break many more things than I fix if I try to hack things around without using the right tool. So I headed off down to the Tool shop looking for a Stud Extractor.
I found myself a little 4 piece Stud Puller Set. They look just like a regular Spark Plug socket with a half inch drive, but they have a little cam arrangement on the inside. You simply slip them over the stud, turn, and the cam grabs the stud. Its arranged in such a way that the more torque you apply to the socket, the harder the cam grips the stud.
I was a bit concerned that I would snap the studs off in the head, or at least destroy the threads, but nope....not at all. These things worked a treat! All four of the studs came out with no fuss at all. I reckon these stud pullers were a great investment! I'm sure I would have stuffed it all up if I continued using my Vice Grips and a heap of swearing.
For those interested, the Stud Pullers I got were $60 (Australian Dollars) and made by a company called NARVIK
So now the studs are all out. I gave all the stud holes a bath in WD40, and gave the studs themselves a bit of a clean up and screwed them in and out of the holes about half a dozen times each. Each time they went in and out I could feel them getting easier and easier. I guess that was because the threads were cleaning up.
Wednesday 12 April, 2006:
Removed:
- Footpegs
- Kickstand
- Bashplate
- Gear Lever
- Kick Starter
All this came off without incident. It's actually starting to look like a bike with some serious work getting done to it now.
Saturday 15 April, 2006:
Removed:
- Front Wheel
- Rear Wheel
- Front Forks
- Rear Suspension
The front and rear wheels came off OK, but the axles didn't come out too easily. When I finally did get tehm out they were quite dirty and showing a fair bit of dirt and crud on them.
The front forks have got quite a bit of just on them, but fortunately not down the bottom. Hopefully they will clean up OK. The worst thing about the forks by far is the fact that the left one has a fairly substantial bend in it!! I was hoping to get by with just cleaning up theforks, but Im now thinking that I will need to take them on a trip to the hard chromers. There is one just near my place, and I took a pair of VF750 fork legs to them a while back and they did a great job on them, so I'll give them another go. But I think I've got to face the possiblity that the one leg is bent too much to straighten. Maybe not though. The metal isn't creased, so here's hoping.
The bad news didn't stop there though. When I got the rea shockies off, I noticed that the top suspension mount on the right hand side was partially stripped. Not too bad, but bad enough for me to want to fix it. As it turned out it wasn't so bad. I got out my Tap and Die set (that I've had for a year and nevr used!) found the right die, ran it over the threads and Hey Presto!! nice well threaded suspension mount again! :)
Yes I know that for some of you this may have been a no brainer, but for me I was quite pleased with it. Thsi is the first bike I've done a full restoration on so I still get a kick out it!
Sunday 16 April, 2006:
Now that I've got teh forks off I've got to get the steering head off. The manual says I need a special too for the job, a Pin Spanner. I don't have one so I resign myself to the fact that the steering head is not coming off today.
Off with the Swingarm, out with the little rubber grommets that live in the numberplate mounts. Just about all done now except for the motor still sitting there staring me in the face.
Like the true coward that I am I decide to leave the motor until I get the steering head off. No particular reason, but I just felt like I wanted to get the motor out last.
Sunday 23 April, 2006:
I spent quite a bit of time this week running around like an idiot looking for a Pin Spanner so I could get the steering head off. It wasn't a trivial exercise because I didn't really know what I needed. All the Pin Spanners in the shops looked nothing like the tools shown in my Clymer manual. The Pin Spanners weren't cheap eaither, so I didn't just want to take a punt, I wanted to get it right.
As it turns out I didn't get one. I was at home playing with the bike, and took off the big nut on the steering head, and low and behold, I was then able to remove the big nut that I was supposed to need the Pin Spanner for by hand. It was very loose! So off it came, closely followed by the rest of the steering head. And I mange to only loose one ball bearing, although I suspect it was missing in the first place. The manuals were very clear that ball bearings were going to fall out all over the place, so I was VERY carefull to have a container under the steering head. Im sure I got them all, but still I only have 41 when I should have 42. Oh well.
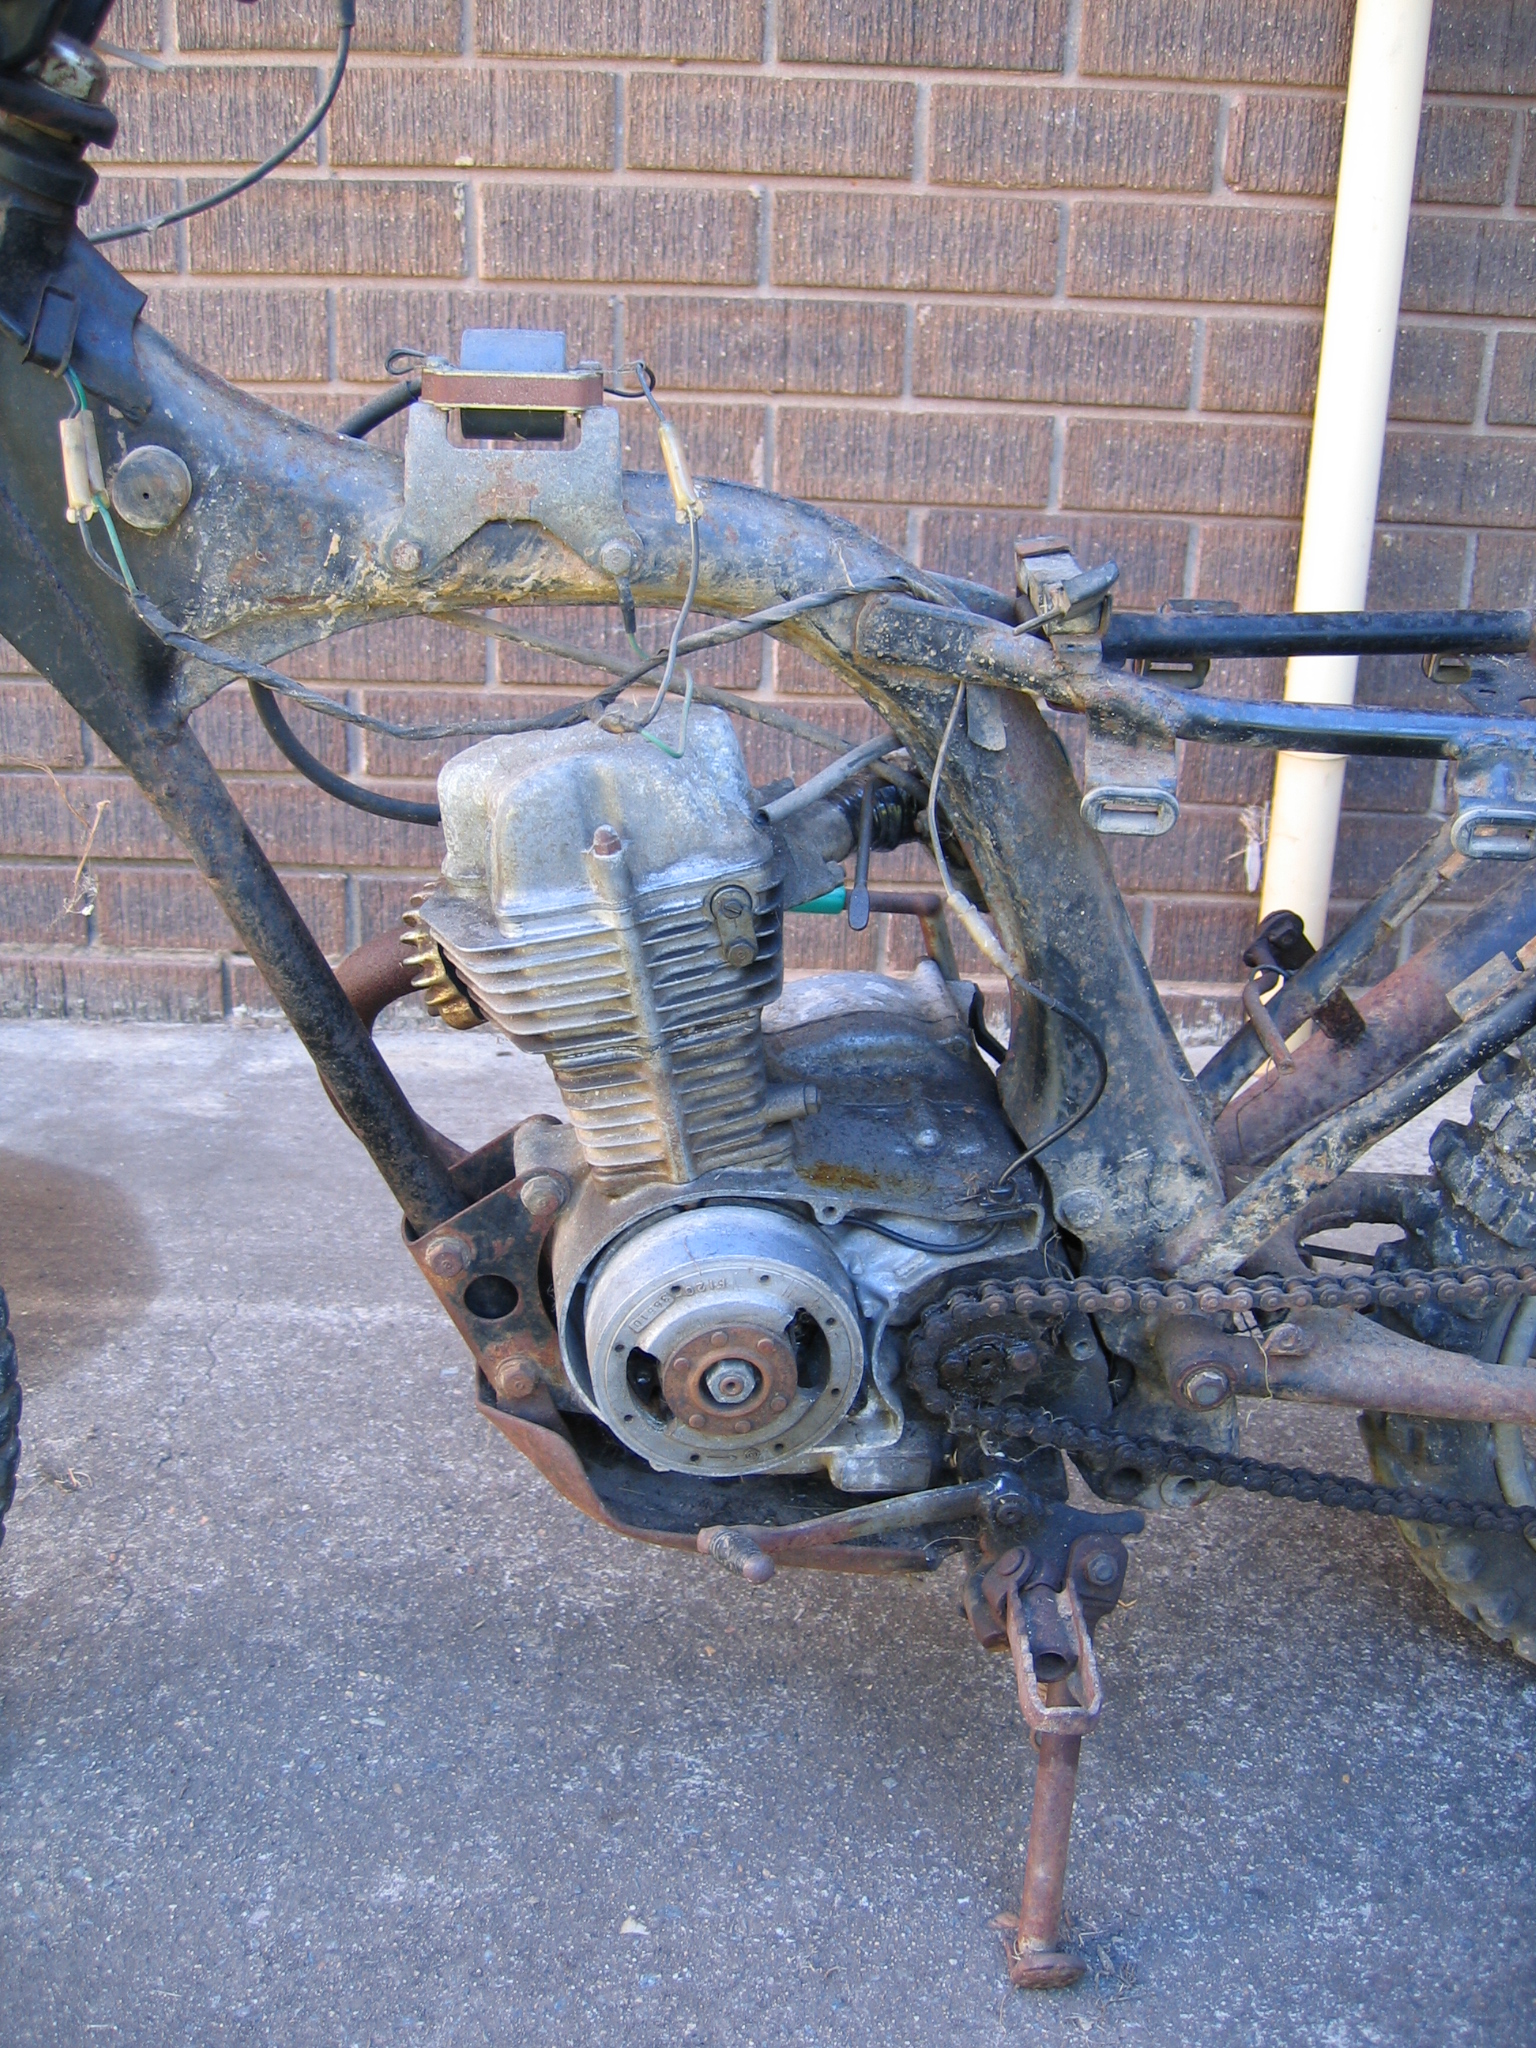
NOW. Finally, the engine.
Bit of an anti-climax really. Undo a couple of bolts, and off comes the frame. I don't really know what I expected, but there you go...bike comepletely disassembled, stored away VERY carefully labelled in plastic bags, cardboard boxes, storage bins and propped up against the wall.
RIGHT!!! So now to get on with the real restoration work!>
Wednesday 29 April, 2009:
Yes you read that right, 2009!!
It is Almost exactly 3 years since I made my last entry here and the bike has not progressed very far at all. I have not given up though, my life has just taken a rather surprising detour and I have packed up all my possessions, and moved state, from NSW to Qld, which is about 10 hours drive North of where I used to live. I ahve moved up here to attend Medical School. So everything had to be put on hold, even the little XR restoration.
The XR is now safely stashed away in a hundred boxes, bags, tins, drawers etc. It has been VERY well documented and photographed, indexed into an EXCEL spreadsheet, so hopefully when I am out of Med School and once again have a garage to work in, I can pull it all out, remember where everything went and get started on it again.
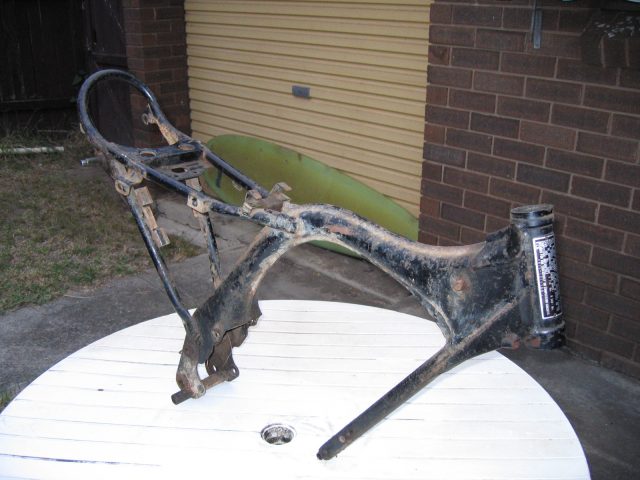
The bike is actually in storage down in NSW. So each Christmas when I travel back down there I have been able to do a few little bits and pieces, mostly to the frame really, because that is one of the few bits I have access to.
At the moment the frame has been sanded right back to bare metal, but because I ran out of time I had to leave it that way between Christmases and of course the inevitable happened, the next Christmas when I went down the frame was covered in surface rust. I got stuck into it again with a angle grinder and wire brush and cleaned it up again (it came up pretty well, so there was no real damage done), but this time I ahve smothered it in oil so it wont rust away again. Next Christmas when I go back down I am going to get the frame and swing-arn dipped to clean it up perfectly and then get some undercoat and a proper coat of paint on it, or I may even consider getting it powder coated, Im not sure which. I'll probably go with painting, if only because I want to practice my painting so when I do more restorations in the future I'll know what I'm doing. And besides, if I stuff up the paint, I can always strip it again and get it powder coated.
The bad news didn't stop there though. When I got the rea shockies off, I noticed that the top suspension mount on the right hand side was partially stripped. Not too bad, but bad enough for me to want to fix it. As it turned out it wasn't so bad. I got out my Tap and Die set (that I've had for a year and nevr used!) found the right die, ran it over the threads and Hey Presto!! nice well threaded suspension mount again! :)
So thats where we stand at the moment.
Bike packed away, and 11 hours drive away. Everything is in storage, bike, tools, everything and I have no garage to work in and even if I did, have have zero income to spend on the bike :(
Oh well, hopefully I will graduate next year and I can get back into the world of the living, get an income, and get stuck into the bike again.
More later......
14 February 2025
I'm back, 16 YEARS LATER!!!!